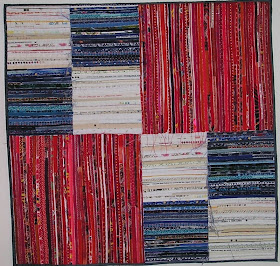
Check these out too...

Wednesday, March 31, 2010

Babies on my mind -- part 3

Today's baby quilts have a long history.  They were made for the grandchildren of my best friend from graduate school, Zuki, who was raised in Hawaii; her grandparents came over from Japan. Zuki's grandmother had access to the scraps from a factory where they made muu-muus and Hawaiian shirts, and over the years she sewed together hundreds and hundreds of the scraps into a single pattern which I don’t know the name of.


I can testify that because the outer edges of the square are all bias, the pattern is a pain to work with. You can stitch those inside straight edges in good faith but when it comes time to put the squares together any tiny deviation in cutting (and remember, these were made in the days of scissors and cardboard templates) translates into big ruffles on the perimeter.

Several years ago Zuki gave me a huge bag of these squares and I made a twin-size quilt out of them for her to give to a nephew. But I still had many, many, many squares left. In the fullness of time Zuki’s daughter got pregnant and I knew exactly what I needed to make for her – a quilt out of the muu-muu scraps. I’m sorry this photo is so dark but it does show the quilt. Since the quilt had to be done for a shower in advance of the baby, I didn’t get to put his name on it, nor did I know he was a he, so I chose a unisex color scheme. 


Zuki, of course, recognized the squares the minute the package was unwrapped and we both got very teary, as did the others in attendance after she told the story of the baby’s great-great-grandmother, who had started the quilt. While this was a surprise for Zuki, I had been thinking so much about this family while I worked on the quilt. I love to work with other people’s leftovers, because it gives me such a bond with some other woman who sat at her machine and sewed late at night, trying to make something beautiful. And knowing from Zuki how much hard work and hard times and sacrifice her grandmother had gone through made working with her squares doubly poignant.

When Zuki’s son had a baby a couple of months later, I waited till she was born so I could sew her name on the quilt, and searched for all the pink fabric in the stash to make it nice and girly.

I am so jealous because Zuki now has three grandchildren and a fourth on the way. The newest baby is named Hazel, which is a great name for a quilt since it has no curvy letters. But neither she nor her cousin-to-be will get their quilts till after my Quilt National entry is in the mail this fall. And these two quilts may have proportionately less muu-muu fabric and proportionately more of something else; I’ll have to check out my stash and see what’s left.

PS -- no baby in Boston yet.

Some advice for Valerie

Yesterday on the Quiltart list my friend Valerie Goodwin wrote: “Interesting dilemma...did a spreadsheet tallying incoming and outgoing expenses related to my artwork expenses. Broke even because of the cost of having a studio space outside the home. I LOVE having this space! Decisions, decisions......I would appreciate some advice.”

I started to write her back a personal note and then I realized that so many of the issues coming to mind might be thought-provoking for others.  Even though we may not have a studio, all of us wrestle with the question of priorities and objectives, how to spend our time, how to focus our activities, what to work on.  So with Valerie’s permission, I’m moving the discussion here.

After 20 years working for a consulting firm, I am unable to answer a question without additional questions. My first is, why is this a dilemma? What's wrong with breaking even on your art, especially when you LOVE the space you're working in? A lot of people would think they died and went to heaven if they found themselves in that situation.

Do you need to make money from your art? I know that you have a decent day job, so I wonder if you have really made this as a decision or if you have just assumed that any enterprise that you can put onto a spreadsheet needs to have a plus on the bottom line. Some people would say otherwise, that they make art for personal gratification, and they’re willing to spend money on it just as they might spend money on playing golf or eating out or going to the movies or giving to charity. I think women in particular are prone to feel guilty about spending time, effort and money on activities that aren’t “useful” or profitable – but let’s don’t do that.

Any financial operation can be described in an equation: Income minus expenses equals profit (or loss). You know the figures in your equation, because you just ran a spreadsheet. But I would argue that this is not the right equation for you to be looking at – the real equation has to do with the income and expenses for your whole life, not just the art part. Since you LOVE having your workspace, you could call it entertainment and cut down some other portion of your entertainment budget. For instance, would you be willing to not take a vacation this year if it meant you could keep your workspace?

But if you really do need or want to make money from your art, how much per year do you need to make? When you have set a specific goal, it’s easier to figure out how to achieve it.

If you want the profit to increase, you have several ways to tinker with the equation.

You can eliminate your studio rent, of course, but maybe there are other expenses you could reduce. For instance, you could cut back on entering shows, thus saving entry fees and shipping. Or you could drop out of some organizations and not attend workshops or conferences.

Or you can increase your income. Could you increase your prices? Could you increase your production? Could you change the kind of work you make so that you could get more money for it?

(Valerie wrote me that she has been doing smaller, less complex works that have been selling well, but at a low price, and they take up her time. She says she would really love to work on larger pieces suitable for exhibit, and get some corporate commissions. And she would like “a bit of income.”)

My advice would be:

• Keep the studio. You LOVE it, and it’s helping you be productive. Cut back on something else in your life to fund the studio for one year. Think of it as an investment in the next stage of your art career.

• Stop doing the small works, or at least stop undercharging for them. They are distracting you from the work you really want to do.

• Resolve to make at least one large work in the next six months. (Or whatever other time frame seems reasonable – you want this to be ambitious but doable, so you don’t fail and get discouraged.)

• Do some research on how to get corporate commissions, and identify three organizations that seem like good possibilities. Put together a portfolio/proposal and submit it to one of them by the end of the year.

• Think about other ways to market yourself and your work, such as entering high-quality shows, updating your blog or website, printing postcards of your work, whatever comes to mind.

• Next year update your spreadsheet and see where you stand financially. More important, see how you’re coming on changing your focus to larger works and commissions. Then recalibrate your objectives, your finances and your plans as needed.

Tuesday, March 30, 2010

Babies on my mind -- part 2

Still no baby today, but here’s a nice baby quilt to show you.

I’ve talked before about how my friend Juanita Yeager is the best scrap-donator in the world. When she puts a “scrap” into her scrap bag is might be two inches square or it might be three feet square. She is of the mindset that when something doesn’t work, she wants it outta here, right now. That makes her a great friend for somebody like me, who is of the mindset that if it’s big enough to see, it’s big enough to save.

So a couple of years ago Juanita and I went to a Nancy Crow workshop on curves and circles. Juanita, of course, made glorious work, but she didn’t like much of it. So this study came home with me under the guise of “scrap.”

One day I needed a baby quilt and didn’t have much time, so I unearthed this top. Juanita had worked in Kona cottons, my favorite brand for solid colors or dyeing, so I was able to open my own Kona stash and find some green to match the green Juanita had used in the original. This enabled me to put the baby’s name on the quilt.  I decided to put the name in the white quadrant, since that's the color that magnetically attracts urp and poop and I wanted to minimize that big expanse.


Sorry to say I failed to photograph the quilt after it was quilted.

Babies on my mind

We’re waiting impatiently for a new baby in our family, a week overdue and no sign of wanting to get on with it. It has me thinking about baby quilts, even though this baby plus two others are going to have to wait till fall to get theirs (I’m feeling stressed over my Quilt National entry, plus two big trips this summer).

I’ve always loved making baby quilts, for many reasons. First, they’re relatively small, thus quick and easy to make. Second, they don’t have to match anything, fit in any series, be any particular shape or size or color. Third, they’re always so special! You make a baby quilt and wow, does it stand out at the shower amid the standard Babies-R-Us merchandise! And fourth, but certainly not least, you often get to put the baby’s name on it, and for me any quilt where you get to use letters is excellent.

Unfortunately I have only skimpy documentation of all the baby quilts I made in the first round of my life, i.e. 35-40 years ago when my age group started having kids. I have photos of two or three of them, faded to pastels, and it’s probably just as well because the quilts were nothing to write home about. They were well designed but poorly executed. It was the 70s, and the only fabric you could get was poly/cotton broadcloth – so crispy that your seams didn’t press flat and your curves didn’t ease. (The silver lining: those quilts are probably indestructible and will live on after centuries in landfills.)

And I was so new to quilting that I hadn’t figured out a lot of the basic concepts such as putting in enough quilting or choosing sturdier fabrics for backing and binding. Several years ago I was asked to do something with a baby quilt I’d made for my niece Allison, who just happens to be the very pregnant lady on our minds today.

I had cross-stitched her name on gingham (yuk) and layered the quilt with flannel batting (yuk) and bound it in a flimsy floral print (yuk) and after a quarter-century of wear, the thing was in pieces. The flannel batting had totally disintegrated, the binding had worn away on the edges and the rest of the quilt was bagging and sagging. However, the log cabin squares had been decorative-stitched to a layer of 100% cotton sheets and they were holding up well. I took the quilt apart, reconstructed it, requilted it, rebound it and somehow even managed to rehabilitate the gingham name panel.

I’ve learned a lot since that first round of quilts, so the subsequent generations of babies are getting a much higher-end product. I thought I would beam thoughts of childbirth towards Boston and see if my reminiscences can urge the baby onward.

Let me start with the best baby quilt I ever made, from 2004. It was a gift for my brother in Australia to give to a baby he knows well. I’ve bought a lot of batiks in my life but used very few of them, and when it was time to make this quilt I was happy to find everything I needed right there in my stash. Too bad my favorite detail is not visible in this photo: inside the arms of the middle H is a little embroidered chair, the empty chair that is always left at the seder for the prophet Elijah in case he comes back and wants to stay for dinner.


This photo was taken at the state fair, hence the attractive pole-and-drape display.  The timing was such that I finished the quilt just in time to enter it in the baby quilt category before it had to go in the mail. You’ll see a red ribbon, which made me mad because the blue ribbon went to an insipid baby-blue-and-pale-gray number with no color contrast, no design, and it didn’t even have the baby’s name on it!!  But it did have hand quilting, which is always big with our state fair judges. I suspect my quilt was downgraded for the dual sins of being being bright and machine-quilted, and that was the year I swore I would never again enter in the quilt division if that’s the way they were going to be.

I’ll tell you about some other baby quilts tomorrow.

Saturday, March 27, 2010

Art-A-Day


March 21 -- in bloom


March 22 -- shed a tear


March 23 -- in the alley


March 24 -- construction site


March 25 -- almost dinner


March 26 -- crane graveyard

March 27 -- tournament time

Wednesday, March 24, 2010

How big are those termite pieces?

Some people commented that they had a hard time figuring out how big the bits are in my various termite art projects, so here are some pictures with scale.

In part 1 of the post, I talked about making 2 1/2-inch squares of scraps.  I would sew four of them together (4x4-inch finished) and then put a narrow border around each set.  I would trim the blocks using my 6x6-inch measuring square, so the blocks finished to a bit larger than 5 inches.


In part 2 I talked about using selvages.  Of course the width of a selvage varies by the manufacturer and by the enthusiasm of the person slicing them away from the edge of the fabric.  Occasionally I would have a selvage that was 3/4-inch wide, but usually they were about 1/2 inch.  For the wider strips I might use two lines of stitching, but generally I had just one line of stitching down the center.

In this detail shot you can see how I would change colors.  I would draw the outline of the design on the top of my quilt sandwich, then stitch one selvage across the quilt till I approached the line.  Then I would cut off the selvage at the correct angle, cut the new selvage at the same angle, butt the two edges together and stitch straight across the join. 


In part 3 I talked about using tiny squares arranged in a grid.  The squares are a bit less than 1/2 inch.


I made a half-inch grid with a Sharpie, putting very dark dots on a large sheet of graph paper.  I held the graph paper underneath the white quilt top, the dots showed through and I marked them in pencil on the quilt top.  Then after I had positioned the fabric bits, I ran one line of horizontal and one line of vertical stitching generally through the center of the bits.  This stitching went through all three layers, holding top, batting and backing together at the same time that it permanently attached the little fabric bits.

Termite art -- part 3

Perhaps the most obsessive of my termite art techniques was the use of tiny squares of fabric sewed down in grids. The squares measure a bit less than 1/2 inch. I attached them the same way I did with selvages – by stitching through a quilt sandwich to applique the design elements at the same time I quilted the layers together.

These quilts have to be designed on graph paper beforehand, and I have to mark a grid onto the white top of my quilt sandwich so I know where to place the bits. But I have used several different techniques to actually hold them in place while I sew them down.


River Map 1: Falls of the Ohio

The first quilt I made in this series was experimental. I started sewing down one of the columns and placed each little bit under the needle when I got there. This turned out to be terribly time-consuming and I decided I needed a better approach. I’ve repressed the details, but in the next two smallish quilts in this series I know there was an attempt to pin the little bits in place before I stitched each column.

There was also an attempt to fuse the bits down on the quilt top before stitching. That was less than successful because I decided I didn’t want the edges of the bits to be pasted down flat on the quilt; I wanted them to be able to wave in the breeze. Had I been willing to fuse the entire square, it would have been relatively simple to execute (put Wonder Under on the entire fabric, and then cut out the half-inch bits). But because I wanted the edges free I had to cut 1/4 inch squares of Wonder Under and tack them down on the grid, then put the fabric bits on top and fuse them down.

In retrospect this was a really bad idea. Not only did it take forever, but I was amazed at how much static electricity built up just by cutting the Wonder Under into little bits and placing them on the quilt. I would painstakingly position the bits of WU, then try to lay down a silicon presser sheet – and the bits of WU would leap up to the sheet when it got within an inch of the surface! I eventually finished the project with copious applications of Static Guard to the presser sheet, and thought there had to be a better way.

My magnum opus in this series was Green Ps, which contains 8,600+ squares of fabric. This time I decided to glue down the fabric squares. After marking the grid on the white quilt top, I would pour glue into a saucer and use a toothpick to put dots on 10 or 12 of the grid points. Then I would use tweezers to put a fabric square on each grid point. Eventually, when all the squares had been glued down, I assembled the quilt sandwich and stitched everything together.


Green Ps, 2005, 40 x 52

This approach worked pretty well, but it took forever. My husband was off on some expedition and I seized on the opportunity to do nothing but work. In the morning I would get up, make a cup of tea, grab a banana, go into the studio and glue bits of fabric. Didn’t have to stop to make dinner or do any other household chores, so I just glued all day.

I wasn’t impatient, I wasn’t frustrated, I just went into a lovely zen state in which nothing existed except the fabric, the graph, the toothpick, the glue and the music.

Finally about midnight I would shake myself back into this world, turn off the lights and go to bed. As I was closing up shop for the night, I would write down how far I had gotten – and realized that in 15 hours I had finished some ridiculously small portion of the whole. That part was kind of frustrating. It took more than a week of glueing 15 hours a day to get the fabric in place, and then several days more to stitch the quilt together.

With most of my quilt series, I have had the experience of liking what I did, and deciding to do it again twice as big. Obviously I made a big jump in size from the River Maps to Green Ps, and would have loved to do it again even larger. But I couldn’t figure out a way to accomplish this without spending a year on the quilt, and I have never made another one. Sure wish I could find a way to do so!

PS - maybe you wonder why the quilt is named Green Ps instead of Green P.  Lisa Strother, one of my quilting friends, knowing my love for alphabet puns, gave me a piece of fabric that was printed with lots of green peas in pods, plus leaves and tendrils.  I sliced that fabric into half-inch bits and put three rows of them at the bottom of the quilt.  So there was one green P at the top and many, many additional green peas at the bottom.

PPS - for typography aficionados, the face is Footlight.

Monday, March 22, 2010

Termite art -- part 2

I talked recently to the Quilters’ Day Out about how I perform “termite art,” obsessive work consisting of many, many little bits. In addition to the 2-inch pieced squares that I described in my recent post, I have done similar work in other series.

One was the use of selvages to make up large expanses of color. I stopped throwing out selvages years ago, realizing that I was in love with the interesting words and symbols printed on them. Finally I figured out what to do with them. When I make selvage quilts, I make a quilt sandwich of backing, batting, and plain white top fabric. I draw the design onto the white top, and then stitch selvages to the sandwich, attaching them and quilting the package at the same time.

When I first made selvage quilts, it was my first foray into what I will call “bad girl quilting,” allowing the raw edges and thread ends to hang out in public as well as using the parts of the fabric you’re supposed to cut off and throw away. I was nervous about doing this, exactly the way I felt the first time I ever wore pants to church – I was half afraid God was going to reach down from heaven and zap me. To appease the gods of quilting, I decided to use the most traditional patterns I could, to reassure them that I did respect the old ways even as I was transgressing.


On The Edge: Double Four-Patch

On The Edge: Rail Fence

Later I used the same technique to make letters of the alphabet.


Black I, 2001, 42 x 45


Blue J, 2003, 48 x 76


That's My Q, 2004, 87 x 56


I’ll write soon about another “termite” quilting technique that I’ve used, this one even more obsessive.

Sunday, March 21, 2010

Termite art – part 1


I had the pleasure of speaking at our local Quilters’ Day Out last week. It’s always a challenge to figure out what to say to an audience of mostly traditional quilters without making them feel that you have abandoned them for the rarefied air of “art.” But I feel such a bond with the traditions of quilting that I love to have these crossover opportunities.

Once I read about the concept of “termite art” – obsessive work made of a gazillion little bits assembled together – and decided that it described me pretty well. I thought I would use this as my theme for the speech, because if there’s anything that traditional and non-traditional quilters share, it’s a love for sewing little pieces of fabric together.

I started by displaying probably the most traditional quilt I’ve ever made, one incorporating thousands of 2-inch squares of leftover bits sewed together. (I wrote about my 2-inch squares in a recent blog post.)


I’ve made those 2-inch squares for years, working on them when I needed the therapy of sewing in a quiet room but was too tired or stressed to do anything requiring actual thinking. The first several thousand went into this quilt, but I kept sewing. One day I realized that my therapy squares were disproportionately green, and it gave me the idea to put them together to make a design. I was on an alphabet kick at the time, so the design happened to be a letter.


Green T, 2001, 33 x 44

That worked out so well that I made three other quilts with the same concept.


Black T, 2002, 33 x 44


Orange Pekoe T, 2002, 33 x 44


Earl Grey T, 2002, 33 x 44

Later I took the concept farther, abandoning the 2-inch square but still using bits of pieced work to make up large expanses of monochrome.


Complementary With an E, 2005, 50 x 68

I'll post later this week about other series that I think qualify as termite art.


Saturday, March 20, 2010

Art-A-Day

March 14 -- slow train

March 15 -- immediate seating

March 16 -- witch hazel

March 17 -- zoowog

March 18 -- on the dumpster

March 19 -- pruning

March 20 -- hopscotch

Wednesday, March 17, 2010

Becoming an artist

Chrismac56 left a comment on my recent post about “what is an art quilt?”

She said, “my quilt buddies were shocked when I signed up for a two-year Art Foundation course and have virtually stopped quilting. I wanted to create more artistically but did not know where to start. I am getting a thorough understanding of creating art - moving right out of my comfort zone learning to draw and paint and loving nearly every moment of it. Hopefully at the end of the two years I will return to quilting with a new vision that will move me in new directions.”

To her, I say congratulations, good luck, go for it! How wonderful to be able to explore something you are intrigued by at length and in depth. But her comment made me think how different her road to art learning is from my own.

I came from a family that was absolutely crazy about art; my father worked in the visual realm all his life (typography, graphic arts) and did calligraphy and a little watercolor. We went to museums, we bought art by the truckload, we talked about art and type at the dinner table. Dad was the arbiter of art, and he defined art as accurate representation, aka drawing. So when it turned out that I could not draw, he officially classified me as “not an artist.” This occurred about the time I hit kindergarten.

That was fine with me; I had lots of other things to do. As far as art was concerned, it was an important part of my life, but since I was “not an artist” I had to be a patron of the arts. I spent a lot of time looking at and acquiring other people’s art, but my education and career went in other directions.

Meanwhile I learned to sew, on a strictly utilitarian footing; made all my own clothes, did drapes and pillows and reupholstery for decades; and early on, fell in love with quilts and figured out how to make them. In time, when I had made baby quilts for everybody I knew, and we didn’t yet have grandchildren who needed baby quilts, my quilts came off the bed and went on the wall and even into some small shows. But I still thought of them as home dec; in my head the A word referred to paintings and prints, not to quilts.

One day at the advanced age of about 50, I was sitting at my sewing machine working on a quilt, when the voice inside my head clearly announced, “This could be art!” With barely a pause, the voice then said, “I could be an artist!” and with barely another pause, the voice said, “I WILL be an artist!”

Of course I didn’t have a clue at the time about what being an artist meant. And unlike my blog reader quoted above, I did not decide to take art classes. I had a fulltime job that took 60 hours a week and lots of travel. I figured if I wanted to be an artist I’d better get on with it, and to save time I’d better just use the tools and skills I had already mastered, i.e. quilting.

Since then I’ve learned a lot about art and being an artist, through three different means.

First, I have taken a lot of workshops from quilt and fiber artists. Some of them focused narrowly on technical skills, but the best ones were broader, teaching about art, design, composition and color. Nancy Crow was my most important teacher and mentor and she has described her master composition classes as the moral equivalent of graduate art courses. Without her keen eye and firm guidance, it would have taken me much longer to get where I am today, if I could have gotten there at all.

Second, I have embarked on a self-guided attempt to make up for the art history classes I never took. I have always been a denizen of museums, and by age 12 could pick out a Pollock from a Miro without looking at the labels, but I started reading books about artists and art movements and have learned a lot. I have read “Art in America” for several years to learn about the contemporary art scene.

Third, I have learned from my own work how to be serious about making art. I believe in critically evaluating my own work and using that knowledge to determine what to make next. I believe in working in series, to fully explore an idea before moving on to another one; rather than flitting about and making a whole lot of unrelated pieces. And I believe in setting objectives for myself, so I don’t so easily get lured into activities that don’t support my serious work.

Maybe I’ll go to art school some day. I’m sure I would love it, and I’m sure I would learn a lot. But for now, I’m on my own – well, just me and my dozens of wonderful, supportive artist friends, some of them in person, some of them via the internet, who are helping me become a better artist.

Tuesday, March 16, 2010

What is an art quilt? Why does this question make me sigh?

There’s a new thread of discussion this week on Quiltart (the email list of 2000+ art quilters around the world) over the definition of art quilts.

One person wrote in, “The only thing that we agree on is that an Art Quilt is hung on a wall. Some think that because it has beads on it -- it's an Art Quilt. Here's one of our main disagreements: Some think that machine embroidery (programmed) on most of the quilt would equate to an Art Quilt. While I think that free-motion machine embroidery is a more artistic form of expression than a programmed one.”

Then somebody else wrote, “What some people think is an art quilt is something that is non-objective. No object can be identified. In truth, art quilts can be both representational and abstract. Some say that it is about being original. But in reality, you can take a traditional design and use contemporary fabrics and call it an art quilt. You can take traditional blocks and reinvent them into unusual balance. You can make a traditional block and use mixed media paint, paper and threads. This is another type of art quilt.”

Another contribution: “Does an Art Quilt have to go on the wall or could it also be a free-standing scuptural piece (sewn through three layers of course!)?”

All this makes me want to unsubscribe from the list and beat my head against the wall.

One of the things I find discouraging about the “art quilt” world – I put the phrase in quotes because I have a lot of problems with it – is that so many of its residents get all hung up on what seem to me to be trivial and wrong-headed issues and so few focus on what’s important: making art.

I occasionally teach a workshop called “art quilt basics” and I start by saying that the phrase “art quilt” has two parts – art and quilt. Almost always, people know more about one than the other. I ask participants to tell me which way they’re coming from, because that affects what they need to know next. People who already know how to make quilts need to know more about art (design, composition, color, etc.). People who already know the principles of art need to know how to make a quilt (piecing, quilting, finishing, etc.)

I think the trivial issues raised in this particular discussion – and in so many other discussions on the Quiltart list -- are all coming from the quilting end of the spectrum. People who have made some quilts are trying to get more arty, whatever that means to them, but are seizing on all the wrong means to accomplish that.

I’m not meaning to trash the Quiltart list. It’s a wonderful and vigorous community that I have been a part of for more than a dozen years, and it puts me in touch with many, many fellow artists and opportunities. But in the inevitable way of the Internet, Gresham’s Law often applies and bad discussion drives out good. And those discussions only reflect what’s going on in the heads of thousands of people, whether or not they write in and post their opinions.

So people who like quilts decide they want to become less traditional and more arty – how to do that? Maybe it’s through materials: putting beads or Angelina fibers or felting or seashells on top of the quilt. Maybe it’s through technique: using free-motion quilting or phototransfer or fusing or raw-edge applique. Maybe it’s through subject matter: being more or less representational, or choosing edgy themes.

Incurable optimists might find this situation heartwarming, seeing people yearning to let their inner artists out. (These are the same optimists who will confidently assure the most awkward newbie that yes, your quilt is ART and it is GREAT!! and don’t let anybody else tell you it’s not!!!)

But pessimist/cynics can find it discouraging, seeing people who “want to make art” but have no artistic vision to express. They’re the same people who send in work to the Stampington magazines, technically magnificent but everybody uses the same rubber stamp du jour of a Victorian lady or a bluebird.

I could rant on, but will cut to the chase. If I am asked to define an art quilt I say that first, it’s art. That is, work made by an artist who has something to say about the world, to the world. And that artist has chosen to use the medium and format of a quilt, defined as layers held together by stitching. And by choosing to use the medium/format of a quilt the artist should have some feeling or connection or commentary to make with or about traditional quilts, otherwise why not make a painting or photography or bronze sculpture?

Monday, March 15, 2010

Quilt Date for March

You may have to go out with a bunch of different guys before you decide who you really like. I promised to introduce you to a new guy every month, and see whether you hit it off with any of them.

A couple of introductory remarks.

First, I am at heart a piecer, not a fuser, not a screen-printer, not a fabric painter, not a hand-stitcher. This prejudice will be reflected in many of the guys I introduce you to. But if something I suggest as a piecing technique makes you think of a neat design that you would prefer to execute in some other technique, go for it! The objective is to get you to find a guy you like, not for you to like the guy I trot out.

Second, I suggest you start small, with a lunch date, not a week in Paris. Try out the new technique in a modest size – 13 x 18 is nice, because you can always turn it into a placemat.

This month’s quilt date is a technique for piecing sweeping, swooping curves with a minimum of tedious fuss. We’ve probably all been seduced by the prospect of whipping out our rotary cutters and slicing away a gorgeous curve – but after we sew the seam it’s lumpy and doesn’t press exactly flat.

That’s because of seam allowances. If you use the popular method of stacking two layers of fabric on top of each other and slicing your beautiful curve through both of them, the shapes are indeed identical, and the two parts will meet precisely – but on the cutting line, not the seam line. And to make a flat seam, the right part and the left part have to meet precisely on the seam line.

Sometimes, if the curve is gentle, or if it curves in only one direction, you can make it work. But if the curve has a small diameter, or if it curves in both directions in an S, you generally can’t.

So is the answer to make templates? God, I hope not!!

Instead – and here’s your date for March – make semi-templates.

Get a piece of pattern material – freezer paper, newspaper, interfacing or tissue paper. Lay it out on your cutting board. Take your rotary cutter and slice a gorgeous curve through the pattern.

Don’t separate the two halves yet – first take a pencil and mark across both pieces every six inches or so, and/or at critical points on the curve. And mark across both pieces at the exact top and bottom of the curve.


Pick up one piece of the pattern and lay it on your fabric, making sure you keep track of whether this is going to be the right-hand piece or the left-hand piece. Now visualize how wide you want your seam allowance to be, and free-hand cut that distance away from the template.


It doesn’t have to be a perfect quarter-inch – no need to fuss with rulers, just eyeball it. There’s enough give in the fabric that you will not have problems. Finally, pin the two pieces together at the marked points, and sew. The seam will press perfectly flat.


Now put the next two templates down on the fabric you have just seamed and pressed, and repeat the process for the next curve.

Replace template #2 and cut along the left edge.  In this photo template #3 is waiting, but I will actually cut it from a third piece of fabric.

Note that I do not suggest you cut out all the pieces at once.  It's way too easy to lose your place and try to sew the wrong pieces together (ask me how I know).  Instead cut two pieces (one curve), sew and press, then move on.

With this method you can make curve after curve, as in this quilt of mine.


V-8  44 x 29"

I suggest a small sample with three or four curves, either the same curve repeated or a different one (heck, the fun part is the cutting, so why not do it as frequently as possible?). Don’t get too extreme: your curve should be more like the profile of a watermelon than the profile of a grapefruit. Start with a C-curve or an S-curve, not a winding road with six changes of direction.

If you like this technique, here are some ideas for the second date:

• Do the same thing on a larger scale than your sample.

• Make several modules on the same scale as your sample, and join them into a larger piece.

• Try more extreme curves.

• Or anything else that strikes your fancy.

Let me know how it works out. If you want to send me a picture of what you made, I’ll post it.

Have fun!


Finding your voice – part 2

I said in a recent post that an artist’s career goes through three stages. First, you learn the basics – how to use your medium and your tools. Next, you find your voice. Finally, you make good work. My observation is that too many fiber artists never get past the first stage. They get seduced into taking workshops or buying books or buying new products that give them lots of new toys to play with, but they never settle down to do their best with one or two of the toys.

Sometimes people are proud of this. “I would get bored if I made the same quilt over and over again,” they’ll say. Or “if I didn’t try new things my work would be dull and sterile.” Or “I could never make a series; I’m just too creative to be tied down.”

So I ask, how come 99% of the famous artists in world history managed to develop recognizable voices and still be creative? Would you turn down a gift of the 31st Rouen Cathedral picture because Monet had done it so many times before? My prejudice is clear – series yes, stifling no.

That’s why I caution artists to, for instance, go to workshops with the specific objective of bringing home something that relates to their existing body of work. It keeps you focused on further developing your pre-existing voice rather than going off on something completely new. But that advice presumes that you already have a voice under development, and you’re happy with it, and you feel satisfied and engaged in moving it along.

Sometimes that isn’t the case. Perhaps you are a relative beginner, having learned the tools and techniques but not yet focused on a voice. Perhaps you are an accomplished quilter who has just recently decided to work in series, to assemble a body of work rather than a lot of individual pieces (in other words, to start thinking less like a crafter and more like an artist). Perhaps you have a body of work that you don’t think you’re done with, but you’ve hit a dry spell. Or perhaps you’re “between jobs,” artistically speaking. In these situations, you may be searching for something new that will ring your chimes, and that can be a difficult task.

Four years ago I had a solo show of quilts depicting letters of the alphabet. When it came down, I didn’t have any urge to make any more in that series, so I was looking for a new thing. It took me almost two years before I figured out what that was going to be. During that period, I wasn’t blocked – I made something like 18 large pieces – but I couldn’t get anything to stick. I wasn’t being flighty – I would make three or four pieces in what I thought was going to become a good series – but in the end they weren’t good series and I abandoned them.

I once gave a talk about this search and likened it to dating. Sometimes it only takes one date to decide it’s not going to work. Sometimes you go out with a guy several times, feeling a fair amount of initial attraction, but you realize after a while that you don’t seem to have anything important to talk about. Sometimes there’s a spectacular one-night stand that you know from the start is never going to happen again. All of those things happened to me in the quilt department before I found my (current) soul mate.

You never know what’s going to start you on your Rouen Cathedral. Sometimes you fall in love with a technique, other times with a process (they’re different), other times with a design element, other times with a subject. You may have to go out with a lot of guys before you find the right one, or you may find bliss with the first one you meet. Who knows!!

So here’s my great idea – I’m going to try to be a matchmaker. If you need a new guy, listen up! I’m going to trot somebody out every month and set you up on a first date. It’s up to you whether you want to have a second date. But even if you don’t, maybe you’ll have fun. And maybe the guy at the next table will turn out to be your honey.

PS – even if you have a perfectly wonderful honey already, you might get a frisson out of a few hours with somebody new. Heck, it’s only lunch….Enough with the metaphors already. Tune in on the Ides of March. (Hey, that's today! See you later....)

Saturday, March 13, 2010

Art-A-Day

March 7 -- at the creek

March 8 -- foot bridge

March 9 -- Happy Hanukkah!

March 10 -- big bag

March 11 -- a day with sunshine

March 12 -- industrial strength pruning

March 13 -- gallery talk

Friday, March 12, 2010

Assessing your own work

Elizabeth Barton had an interesting blog post this week about how artists should go about setting and achieving their goals. Her last point was that people need to experiment, but then need to assess what they have done and decide whether the experiment got them toward their goal or just took them around in circles.

This comment resonated with me because it fits in with the whole idea of finding your voice and not getting seduced off on tangents, which I commented on in the context of attending workshops. But tangents offer themselves in many other contexts as well – looking at people’s blogs, seeing other people’s work in a show or magazine, reading a new book. And too many times those tangents do not accomplish much except to take up time and produce work that may be nice, but doesn’t really get you closer to your goal.

I’m not saying that you must never take a tangent. Sometimes you need to take a little vacation from your real work. It can be emotionally refreshing to make the baby quilt, organize the wedding, sew up valentine hearts, whip out 50 sheets of handmade paper, practice some calligraphy, help your friend dye a bunch of fabric. But I don’t count that as art time, the time you are investing in your serious goals.

That’s a tangent. Back to my original point – that you need to assess what you have done. Elizabeth was talking about experimental work, but I will broaden the discussion and suggest that you need to assess everything you have done, and it’s more important to assess your “real” work than your tangents.

Sometimes people ask how you go about working in series – do you sketch out in advance what your next five pieces are going to look like? If not, how do you figure out what to do next?

As an aficionada of series, let me tell you my approach, and what I advise others to do.

After I finish a quilt, I ask myself four questions:
1. What do I like about this piece?
2. What do I not like?
3. What parts of it were easy to execute, and what was hard?
4. Where did I make choices between equally appealing alternatives?

Then I use the answers as a plan for the next work in the series.
1. Repeat some or all of what I liked.
2. Eliminate what I didn’t like.
3. Think of ways to make the hard parts easier, or avoid them.
4. Try one of the other alternatives that I didn’t choose the first time.

I try to be as specific and as rigorous as possible. For instance, my most recent big works were the two quilts that I sent off to Color Improvisations. I can’t show you the full pictures yet (we’re sworn to secrecy till the show opens in July) but I can share detail shots and my assessment of one of them, “Fault Lines 3.”   The quilt is 74 x 76 inches.  What you see in the larger detail shot is less than one-quarter of the quilt.


1. I like the complexity of the line work, the quilting was probably the best I’ve done in my life, I like the huge scale, I got a new burst of enthusiasm over the “Fault Lines” series.

2. The color choice could have been better; not sure I like the placement of accent colors achieved with quilting threads; I wish I had stirred the dye bath more so the back of the quilt was less mottled and more uniform in color.

3. It was surprisingly easy to piece, despite being huge, but very difficult and time-consuming to quilt.

4. I used four shades of red, ranging from light-medium to very dark. I could have used more than one color, or more variety in value, or less variety in value. I quilted each segment of the piece with a separate design rather than use an allover plan, and changed the quilting color occasionally for accent.

Having evaluated the quilt, so what? Now I use the answers to those four questions as a road map to the next quilt.

1. I will do the complex line work again in another huge “Fault Lines” quilt.

2. I will do more careful planning of colors, especially the accent color of the quilting thread.

3. I will quilt it in two panels and join them at the end, rather than struggle with one huge piece.

4. I will use more than one color. I might choose a different design approach to the quilting, and might not use a quilting thread accent color.

I should point out that I love this quilt; it’s one of the best pieces I’ve done. But I still can notice and evaluate the things that weren’t 100% successful, or that I could have done better. Indeed, you could argue that it’s more important to be rigorous in evaluating your best work than in evaluating your mediocre work. You raise the bar by exceeding your best rather than just exceeding your merely OK.

If you are working in series, or thinking about working in series but not sure how to proceed, this is a method that may help you along. Feel free to try it, and let me know how it works for you.