Tuesday, July 31, 2012

Answering your questions: quilting designs

Sharon Robinson said in a comment last week, "Looking at these close-up photographs makes me wonder about how you decide on a quilting pattern or strategy."

Excellent question, and I had to think about it for a while.  For some quilt artists, the quilting is the key element in the art, or at least is equal in importance to the piecing.  One such artist who comes to mind is Paula Kovarik, who draws elaborate designs with her quilting line.  In her day job she's a graphic designer who has been drawing with writing implements for most of her life, which is obvious from the masterful imagery she puts onto her quilts.  I suspect that artists like this think of their quilting pattern at the earliest stages of design, maybe even before they settle on a final composition.

By contrast, there are other quilt artists who regard the quilting as a necessary but mainly functional part of the process.  I am one of them.

For me, quilting is sometimes fun, sometimes rewarding, occasionally an opportunity to realize my artistic vision, but often it's just plain work.  I make quilts because I love piecing, and then I do quilting because the layers have to be sewed together.  I usually wait till the top is finished before I start to think about how I will quilt it.

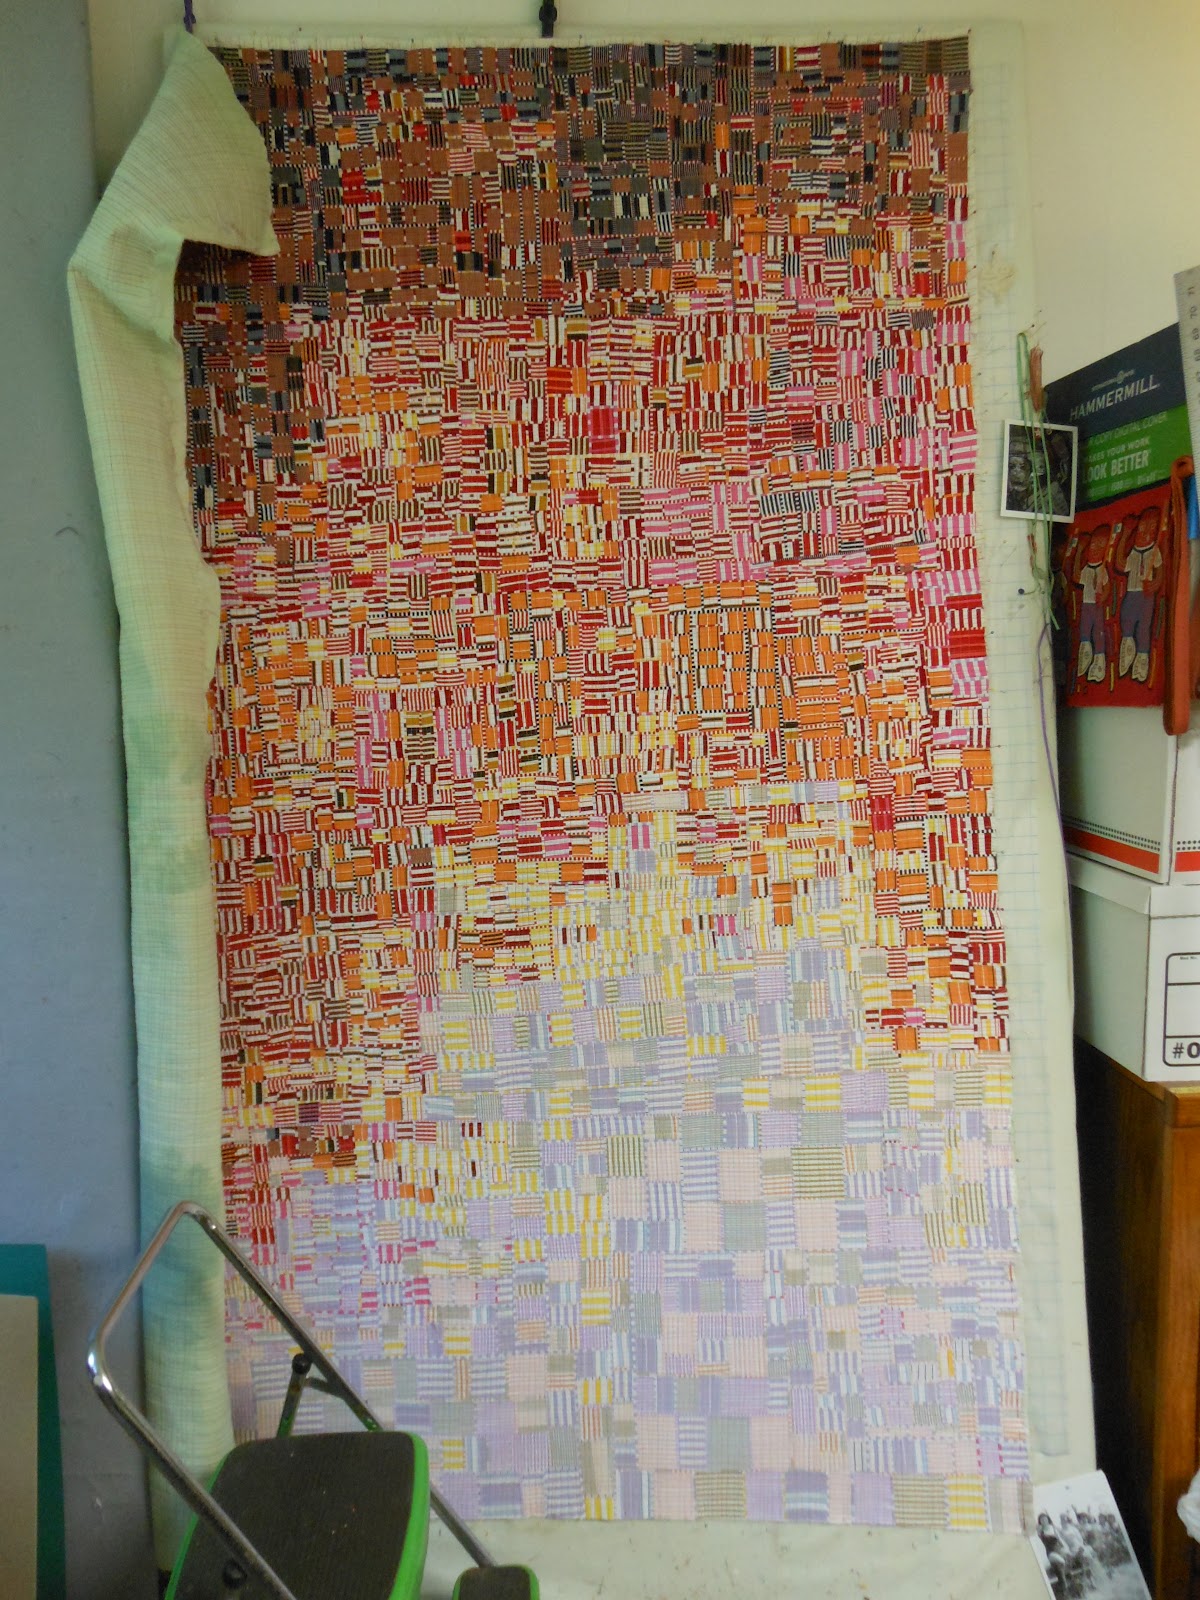
In addition, there's the logistical issue.  Quilting a small piece is quite a different story than quilting a huge one.  I do all my quilting on my plain home sewing machine, not even one with a large harp.  Since my favorite size is somewhere larger than six feet square, it takes a lot of wrestling and manhandling to get anything quilted.

In the past I have done elaborate free-motion quilting on very large pieces, but the last time I did so, I found it so physically wearing that I swore I would never do it again.  I love the effect on the quilt, but not the effect on me.  It's easier to put a walking foot on the machine, roll the quilt into a manageable package and do a simple grid.  That's my default method, especially since the straight lines complement the straight-line piecing of most of my work.

Fault Lines 4, 2010, 76" x 76" (detail)

This piece had relatively large spaces that seemed to cry out for fancy designs.  I realized that I would be bored silly quilting the same designs on the whole piece, so I decided to use a different design in each little segment (segments ranged in size from a half-inch square to about six inches square).  Probably the best quilting I've ever done, but I don't think I'll do it again.

Crazed 4: Painted Desert, 2008, 27" x 39" (detail)

This is my default quilting pattern, largely for physical reasons, but also because the simple grid echoes the lines of my piecing.  I like to use several colors in the quilting and allow the grid to become irregular.  The lines are spaced anywhere between an eighth- and three-eighths-inch apart.


Shards 8, 2002, 12" x 14" 

On tiny quilts sometimes I quilt very dense parallel lines, less than an eighth-inch apart.  I love the effect, but if I used this on a huge quilt it would never be finished.


Fault Lines 1, 2008, 34" x 35" (detail)

On smaller quilts I can be more adventuresome because the piece doesn't have to be rolled up and can be rotated more easily under the needle.  Here's one where the piecing lines go on diagonals, so I quilted lines parallel to the piecing.  I love the final effect, but it was quite an intellectual challenge to plot the lines to cover all areas of the quilt at the density I wanted.

Shards 9,  2002, 9" x 11"


On very small quilts it's easy to make beautiful curves with a walking foot, but you have to be able to turn the quilt freely while you stitch all the way across in one pass.  If you stop in midstream, the line will have an obvious, awkward break in the curve and look awful.  I wish I could do this on a larger quilt!

Bottom line, I wish I were physically able to do more ambitious quilting on the majority of my pieces, but they're just too big.  I'm fortunate that the straight-line quilting that I can accomplish with relative ease looks pretty good with the kind of quilts that I usually make.  But in the end, I don't worry much -- I think my quilts are judged on the piecing rather than on the quilting.


Monday, July 30, 2012

Answering your questions: hoop-la

A blog commenter asked recently whether I use a tiny hoop in my daily stitching.  The answer is no.

When I learned embroidery decades ago from my grandmother, we used a hoop for everything.  Keeping the fabric taut makes it easier to do many stitches, and more important, keeps the fabric from puckering because you can't inadvertently pull the thread too tight.  But using a hoop also makes it a bit more difficult to stitch in the center, because you can't reach it with a thumb above and finger below, the optimal position for many stitches.

I don't remember when I gave up embroidery hoops.  I know that I abandoned a hoop or frame for quilting about ten years ago.  It was just too much trouble to keep repositioning the hoop, and you couldn't stitch long lines of quilting without letting the thread hang there at the edge of the hoop for a while till you moved it.  And after you moved the hoop, the quilt was all creased and out of position.  So I started quilting without a hoop, with the quilt flat on a table or sometimes just spread over my outstretched hand.

After I realized I didn't want to use my quilting hoop any more I made it into sculpture.

Yes, without a hoop you have to be a bit careful with the stitches so they don't get too tight, but hey, learning to control your tension is the key to mastering all kinds of needle arts.

I quit using embroidery hoops for the same reason --  I didn't like how the hoop wrinkled the fabric and sometimes crushed the stitches.  It's important to control your tension so the stitches are neither too tight nor too loose, but you can learn that.

When I'm doing my daily art project I simply hold the four-inch squares in my hand.  When I work with larger pieces of embroidery, or when I stitch my four-inch squares together into panels, I often work on a table or flat board in my lap.  Much of the time you can glance your needle off the table and back up through the fabric with each stitch without having to put a hand beneath the work.

As with any form of handwork, you will find your own rhythm and style.  Just as some people hold their crochet hooks way different than I do, people have many different ways of doing hand stitching.  Some use thimbles, others don't.  Some push the needle with the pad of their finger, others use a fingernail.  Japanese sashiko stitchers use a leather "thimble" in the palm of their hand.  What's important is to practice, practice, practice, until you figure out the way that works best for you.


Saturday, July 28, 2012

Block and tackle

Yesterday I finished quilting on my second major Quilt National entry and have moved on to the next step in finishing: blocking the quilt.  It's too big to fit on a design wall board so I have about three-quarters of it pinned up, and in a day or two will take it down, rotate it and block the rest of the quilt.


Here it is looking pretty beat up.  It has been rolled and folded the long way for the last week, and the vertical creases are pretty prominent.  I started by pinning the dark edge, which I had previously trimmed to be straight, to the top of my design wall.  Then I pinned the right edge down the side of the board.

After the right side was established, I opened the quilt up to the full width of the board and pinned all four sides.

I put pins every three or four inches, trying to get the quilt as taut as possible.  I sprayed the quilt with water, getting the quilt fairly damp.  Then I went back and redid all the pins, pulling each edge of the quilt a bit farther away from the center and repinning.  The damp fabric stretches a bit more, so that my second pass got all the edges a quarter-inch or so farther out.  I adjusted pins as needed to eliminate bulges and ruffles at the edges, and to stretch out any lumps or ripples in the center.


I know that some people like to block their quilts with steam and/or ironing, but I like the low-tech method.  It does stretch the quilt more than you might imagine, and if the top was trimmed straight across before quilting, like the dark edge on top in these pictures, it will probably end up needing to be trimmed again.  But it will be beautifully flat, ready for finishing.

Wednesday, July 25, 2012

Monday, July 23, 2012

Changing the bobbin in midstream

For the last month all I've been doing in the studio is quilting.  Can't count how many spools of thread I've gone through and how many bobbins I've wound, but I can tell you with absolute certainty that it's a drag to run out of bobbin thread somewhere in the center of the quilt.  But I have figured out a routine that minimizes the angst.

Here's how I do it.

When you realize the bobbin has run out, lift the presser foot and pull the quilt toward you till you find the last complete stitch.  Pull the bobbin thread to the top of the quilt.  It's probably only about a half-inch long, not long enough to bury with certainty that it will stay buried.  So pull out a few stitches back, always pulling the bobbin thread to the top, until it's at least an inch long.

Put a new bobbin in.  Now grab the loop of top thread and stick your finger into the loop so the takeup mechanism won't pull it taut.

Position the needle exactly at the last stitch.  Rotate the wheel manually one turn so the needle goes down and grabs the end of the new bobbin thread and comes back up again.  Pull on the top thread (still wrapped around your finger) until the bobbin thread peeks up above the quilt surface.

Snag the loop with a needle, tweezer, seam ripper or other tool and pull until the end of the thread comes up.  

Pull the thread end over to the side, along with the thread end from the old bobbin and hold them both firmly with your finger so they won't escape.  With your other hand, grab the top thread on top of the sewing machine, somewhere between the spool and the tension plates, and pull it backwards so the thread is taut between the quilt and the needle.

Lower the presser foot so the needle is exactly in place to continue the stitch line.  Holding the thread ends taut with your finger, start stitching again.

The quilting line will look perfect, because the top thread is uninterrupted.  Later, go back and sink the thread ends.  If you don't know how to sink thread ends, check out this tutorial.

Sunday, July 22, 2012

Photo suite 30 -- icebreaking

Hey, folks, it's HOT here!  Time for a bunch of photos from Antarctica.

Our ship needed to go from point A to point B, but there was ice in the direct channel.  For an hour or so the captain amused himself and us by breaking a path through the ice.  The ship would back up, then hurtle full speed ahead and ram into the ice.  That would break apart maybe a half ship length.  Repeat, a little bit to the right or left of its previous course (to make a wider channel) until the passengers got bored.


Meanwhile, the sheet of ice that we were breaking through got progressively more fractured.


Eventually we backed out and went the long way around, which the captain had planned to do all along.


Saturday, July 21, 2012

Quilt virginity

Yesterday Karey Bresenhan, the head of Quilts Inc., which sponsors the big quilt show in Houston, posted a message to the Quiltart list.

She wrote:  "please…don’t jeopardize your chances at winning a ribbon by showing your work prematurely on your blog or Facebook page. The judges keep up with these pages, too, you know, and they really like to judge blind, which means they do not know who made the quilt. If your good news is spread everywhere (WITH a picture) then it’s going to be hard for them to maintain that necessary lack of knowledge. This could work to your detriment, folks. Although it is not illegal this year, I strongly recommend that you take those pictures down right away. We’ve had several judges complain already, so I feel pretty sure this loophole will close next year. In the meantime, it is in your own best interest to take down the photos."

Judging by some responses on the list to that message, I am not alone in feeling that this is wrong.

I understand that every show sponsor wants to have a lot of new work on display, and doesn't want its thunder stolen by work that has been seen a lot.  Some of the top shows require that quilts have not been shown anywhere else, and a few even require that they have not been seen on the internet.  But even Quilt National, famous (infamous?) for its strict virginity rules, doesn't prohibit people from showing their own quilt on their own website, blog or facebook page.

And apparently, neither does the International Quilting Association, the sponsor of the judged categories at Houston.  Yet people are being threatened that if they post a photo of their quilt, they probably won't win a prize.

I think this is kind of low.  If a show thinks it can get away with such a restrictive virginity rule, then it should announce it in advance.  People can decide whether they want to enter or not, with those conditions.

Now on to those complaining judges.  Having both juried and judged a bunch of quilt shows, I know that it's nice to come to the table in total ignorance, to see everything as if it arrived just yesterday on a spaceship from Mars.  You don't know who made it, you haven't seen it before.  But this is frankly impossible, even if you don't own a computer.

The quilt world is a small one, especially at the top.  The same people enter year after year, and those who follow the shows come to recognize their work and their styles.  Even if these people don't post their latest quilts on their websites, I'm pretty sure that many of us would know the maker.  


I knew this quilt was made by Kathy Nida, before I ever looked at the signage

If a quilt expert, who presumably has been to many, many shows and seen hundreds if not thousands of quilts, is asked to judge at Houston she knows she's going to see identifiable work.  If she feels that being able to identify even more work, thanks to her internet travels, would make her job more difficult, then perhaps she should voluntarily stop "keeping up with these pages" for a couple of months.  Or decline the honor.

But I have to go back one step and disagree with the very premise.  Karey suggests that if a judge knows the maker of a quilt, that quilt isn't going to win a big prize, but we all know that's not true.  If it were, then Hollis Chatelain and Caryl Fallert, just to name two among many of the easily recognizable usual suspects, wouldn't keep winning at Houston and Paducah.  

In the legal system, judges recuse themselves if they are close friends with the plaintiff or defendant, but if we asked quilt show judges to recuse themselves when they recognize an artist, we'd often have nobody left to choose the winner.  That's a standard of viriginity that would quickly put the quilt shows out of business.  


Wednesday, July 18, 2012

Hang it up

Discussion this week on the SAQA list about what kind of hanging devices people use for quilts.  Having tried every method known to mankind, I felt qualified to chime in, but it occurs to me that such discussions are always better when illustrated.  So here's my exhaustive list of hanging rods.

When I started out, I used dowels because that was all I could think of.  And as a newbie, I couldn't think of anything to do with them other than to have them longer than the quilt, and have them rest on two nails in the wall.  This presentation is a bit amateurish, and the visible rod is a bit 1970s, but it allows me to switch quilts around easily, and I still have several of these rods in my house.

I also have a permanent installation with a curtain rod that allows me to display different quilts in my prime viewing spot, over the stairwell.  After several years of use it's starting to get a little saggy in the middle; it may be time to buy a replacement.


The first step up in sophistication is to cut the rod to size, just a bit shorter than the quilt so it will be invisible.  Now you need a new rod for every quilt, unless you happen to have a couple that are the same width.  Unfortunately, finding one of the right length is like hide-and-seek, even if they're labeled.

The problem with dowels is that wider quilts are so heavy that they will make the rod sag.  And the dowels only come 48 inches long.  So I use slats for wider quilts.  Arguably slats, being thinner than dowels, allow the quilt to lie flatter against the wall, although I still use dowels a lot.  In either case, I  put in eyehooks, which can be hung onto nails or threaded with fishing line to hang from the ceiling.  This is the standard presentation for sending quilts to a gallery or museum; they can choose the hanging method they like.

But slats, too, can bend under the weight of a large quilt.  Unlike dowels, which simply sag downward, slats will bow out from the wall, which looks really terrible.  For very large quilts I've been known to tape two slats together for strength, or buy fatter and wider slats.

The problem with all these wooden rods is their length.  If you have to ship a wide quilt to a show, you need a really long box to hold the hanging device as well as the quilt, thus increasing your hassle and shipping cost.  So the last time I had to ship a wide but short quilt, I went shopping for an expandable rod.  Found it in the drapery department -- it's metal, sturdy, flat, and has nice holes at the ends for hanging.  I was sorry I had to pay for the heavy mounting brackets, which went immediately into the recycling bin, but even so it only cost about $13.

I was able to roll the quilt the short way, collapse the rod, and fit everything into a smaller box.  And best of all, I'll be able to use the rod again for almost any of my wider quilts.  Will I dispose of my huge stockpile of dowels and slats?  Of course not; even if the metal rod becomes my default device, there will be times when more than one quilt has to be out in public at the same time.  At $13 apiece, I don't know how many of these lovely little things I'll want to keep on hand.

But one last thing:  for tiny quilts, those less than eight or nine inches square, I make plastic slats from old mini-blinds.  I cut the blind slat to the right length with scissors, round the edges, then punch hanging holes in each end.  Each little quilt gets its own slat for all time.  Best of all, the slats are free -- I rescued two sets of blinds from the neighbors' trash pickup several years ago and I think I have a lifetime supply.


Tuesday, July 17, 2012

Monday, July 16, 2012

Snobbery

When I wrote last week about having bought some fabric at the Big Fabric Store, somebody posted a comment that read, "I am surprised that given your disdain for anything not up to your standards of "art," that you would use sub par fabrics like those you find in that 'Big Fabric Store'....  considering the time and effort I put into my work, I wouldn't consider using low quality fabric."

I replied that fabric quality isn't all that important to me, for a couple of reasons.  First, most of my piecing uses  quite tiny bits, which doesn't give bad fabric all that much opportunity to misbehave or look limp and cheesy.  And second, I never wash my fabric, before or after construction, so there's no opportunity for it to bleed or fray.

But the comment got me to thinking about snobbery.  We all are snobbish about certain things, totally laissez-faire about others.

I'm not very snobbish about materials, beyond never using polyester batting.  I'll use the cheapest fabric I can get away with, which means innocent till proven guilty.  (On occasion I've cussed at certain faults of low-end fabric, but high-end fabric has its faults too, including the price tag.)  I love Aurifil thread, but am willing to use Coats & Clark if that's a color I need.  I own a huge supply of a relatively low-end machine embroidery polyester thread, which I use for quilting, because it works better in my machine than a lot of higher-priced specialty threads.

I'm a bit more snobbish about my tools.  I love my Berninas and am spoiled by their performance and features; once took back a lower-price machine, highly recommended by many quilters, after owning it five days and deciding it was just too clunky.  I've never had the urge to see if needles other than Schmetz might work just as well.  I won't touch those cheap, small, dull-from-birth seam rippers.  I have great lighting above my worktable and my machine.  But I buy mid-range irons, content to replace them when they die, and mid-range scissors (I am a snob about having many, many of them so one is always within reach).  And rather than invest in a gorgeous studio, I have a jerry-built operation in which a card table is an essential part of my sewing surface and the design walls are just panels of insulation board propped against the wall.

But where I'm a real snob is about process.  I believe passionately that piecing is far more elegant than fusing, that it's essential to be meticulous about pressing, that a quilt should lie flat on the wall, that the corners of a faced quilt shouldn't be any thicker than the middle.  I believe that when you get stuck on a project you should put it up on the wall and wait for the fabric to speak to you.  I believe that you can and should work on several things at once. I could probably think of many other examples.

Once a big discussion broke out on the Quiltart email list about people who still regard hand quilting as aesthetically and morally superior to machine quilting and whether such traditionalists deserved to die.   My take was that they were wrong about hand quilting but that I could cut them a lot of slack about love of process.

Many people love or hate process as much or even more than they do product.  For example, fly fishermen on foot in hip waders feel superior to guys in boats, who in turn feel superior to those in boats with sonar.  Bow hunters feel superior to hunters with guns, who in turn feel superior to guys who drive their pickup trucks out and blind deer with spotlights.  Cooks who make their own pasta feel superior to those who buy fresh pasta from the grocery store, who in turn feel superior to those who buy pasta in boxes, who in turn feel superior to those who have Domino's bring over some penne primavera.  People who do their own taxes in pencil on paper forms feel superior to those who use TurboTax, who in turn feel superior to those who go to H & R Block.

I bet every one of us has our own little process prejudices somewhere deep inside, whether they have to do with quilting, hunting, fishing, cooking or what have you.  We all love to feel superior to somebody else, and process is probably a less harmful criterion for making such judgments than gender, sexual orientation, race, religion or others of the more popular rationales.

What are you snobbish about?  What don't you care about?  I'm sure your mileage will vary.


Thursday, July 12, 2012

Good news and bad news at the fabric shop

I try to avoid fabric stores, especially the big national chains, unless I really have to.  About the only things I've bought much of in the last few years are solids, and I try to buy staples like thread and batting in bulk, often by mail, so my trips to the store are limited.  Thank heaven -- I hate retail establishments and I hate shopping.

But yesterday I was in need.  I just finished quilting Top #1 for my Quilt National entry, and that used up my last big piece of wide drapery-weight cotton that could be used as backing.  To move on to Top #2, I needed some more fabric for a back.  Armed with a 50% coupon I headed off to the Big Fabric Store.

Let's start with the good news.  At least I'm going to regard it as good news.  I found some stripes!!!  Not red and white, which is always in stock, and not even blue and white, which I had bought a yard of at a pre-July 4 sale.

These were browns and dark reds, plus another yard of a yellow-and-red I had gotten a few months ago and used plenty of in my striped quilt, just finished.  I wish I had found these darker stripes three weeks ago when I was making the dark half of Top #2, but at least I'll have them on hand for the next time.

But on to the bad news.  At least I regard it as bad news -- probably the CEO of the Big Fabric Store will break out in smiles when he reads it.

I've watched thousands of yards of fabric being cut during my lifetime, and I have never seen a clerk as ostentatiously stingy as the one who waited on me yesterday.   With each piece of fabric she spent at least 30 seconds lining up the cut edge of the fabric with the line on the left of the yardstick, tugging and pushing the bolt so not a single loose thread protruded beyond.  When she had to cut more than a yard, she fussed and fiddled with her thumbnail to make sure she didn't grab an eighth-inch too much, or place it back on the line an eighth-inch too far.

For one piece of fabric I told her I would take the entire length left on the bolt.  She measured it as one yard, 28 1/2 inches, then converted it with her calculator to 1.792 yards.

One piece of fabric had gotten wrinkled at the cut end, and after she fiddled with it a bit I noticed that she was getting ready to cut two inches off the cut end.  Ordinarily I would probably have watched with curiosity to see what was going on, but I was really getting annoyed by this time.

I asked her why she was going to cut it.  Because it was all wrinkled and this would give her a clean edge to measure from.

Why don't you just cut my yard without trimming off the end?  Because that would cause our inventory to come out wrong.  We have to keep track of the shrinkage.

Were you going to throw the two inches away?  No, it would go into a bin to check against inventory.

Having detected my annoyance, she decided to change course and spent a full minute smoothing out the wrinkled edge and lining it up carefully.  After a great deal of back-and-forth nudging I said, "God forbid you should give me an extra quarter-inch."

At which point she righteously sniffed "well, if we give you a quarter-inch extra and the next person a quarter-inch extra and everybody else a quarter-inch extra it would really mount up.  You have no idea how much we lose from shrinkage."

Well, she's right.  But the policy seems like a good example of penny-wise, pound-foolish.  For one thing, it takes an awful lot of time to push and pull to prevent giving away that extra quarter-inch.  I had previously spent at least ten minutes leafing through some truly awful scrapbooking magazines while waiting for my turn at the cutting table, while the clerks fussed and fiddled to keep from giving other people an extra quarter-inch.  We all know that the customers' time means nothing to the Big Fabric Store accountants, but how about the clerks' time?  How about the time that somebody was going to have to spend to measure that wrinkled two inches and tote it up for inventory?  And I thought retail shrinkage mostly comes from shoplifting or employee theft, not from inaccurate fabric measurement.

More important, this kind of stingy behavior tends to annoy the customers, already testy from ten minutes worth of awful scrapbooking magazines.  There's a concept in retailing called lagniappe, a little bit of extra product that the vendor gives away for customer goodwill.  Whether it's the chips and salsa at the Mexican restaurant or the cheese sample at the grocery store, this makes people happy and, supposedly, willing to keep that wallet open a little more and/or come back again soon.

For most of the thousands of yards of fabric I've purchased in my life, clerks have been fair in their measurements but on the generous side.  An extra half-inch in the grab, rounding the end of the bolt down to the nearest eighth-yard instead of measuring it to three decimal places.  Did that practice send their stores into bankruptcy?  I don't know, but it sure did bring me back to buy another hundred yards of fabric.  By contrast, I'm really looking forward to not patronizing the Big Fabric Store any time soon.


Wednesday, July 11, 2012

Embroidery tutorial 5 -- blanket stitch

I realized while writing about the various stitches that I have been using in my daily art project that I really don't love the elaborate, esoteric stitches that you have to look up in the book.  I'm happier using the familiar stitches that I learned as a child, but trying to loosen up and do interesting and original things with them.

I've been reading an excellent book, "Stitch Magic," by Jan Beaney and Jean Littlejohn, which urges readers to bend the rules with familiar stitches.  For instance, they suggest you can execute stitches in regular or irregular patterns, going horizontally or vertically, making squares or triangles, in rows or in  haphazard meanders.  I'm trying to use this approach with my daily doodles; not sure I have mastered the concept but I'm working on it.

Recently I've been using a lot of blanket stitch to see whether I can break away from the formal stitch and use it improvisationally or creatively.  I think I made some progress, but not a lot.  It's hard to break away from the innate regularity of the stitch.  Here are some of my doodles.


I think this is my favorite.