Saturday, April 16, 2022

Sanford Biggers at the Speed, part 2

More comments about the Sanford Biggers show.  Not everything in the show featured messy paint applications.  One of the quilts, stretched on a wood armature, had dramatic holes, bordered with black organza to give a striking shadow illusion.


Sanford Biggers, Ecclesiastes 1 (KJV)
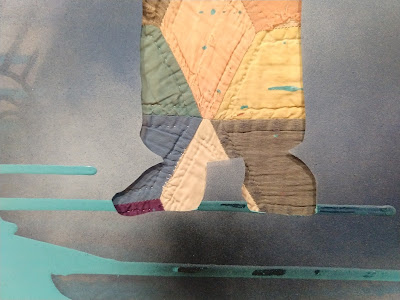
A similar see-through illusion appeared in an assemblage of six framed quilt sections, with some two-layer areas where the semiopaque frosted plexiglass was cut away to reveal a quilt about a quarter-inch behind.  

Sanford Biggers, Nyabinghi, detail below

Two of the quilts, both Tumbling Blocks, were overlaid with sequins and lame, glittering under the gallery lights.  No paint drips on these, just fabric collage.  

Sanford Biggers, Ooo Oui, detail


Sanford Biggers, Ooo Oui

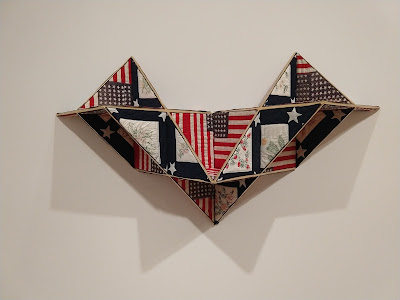
Several pieces were made by stretching quilt sections into wood-framed constructions.  The first one we saw as we came through the exhibit was intriguing, made in part from American flag-motif quilts. 


Sanford Biggers, Reconstruction, detail below

But the next four or five, the same concept with slightly different construction shapes, all kind of looked alike, and the fact that they were hung too high on the wall to see most of the surfaces made them easy to walk past without stopping to look. 

Maybe I would have liked them better if all the "construction" pieces had been hung together for comparison, but they weren't.

I'll give you the wrap-up report in my next post.  


Tuesday, April 12, 2022

Sanford Biggers at the Speed, part 1

The current blockbuster show at the Speed Museum is by Sanford Biggers, an African American artist whose shtick is to paint on top of antique quilts.  I have been somewhat familiar with his work for several years; in 2017 one of his quilts was in another show at the Speed, and I wrote about it in a blog post.  

I found some things to like in that piece, but I had two big reservations.  First, Biggers made a big deal out of the false story that quilts were used as secret signposts along the Underground Railroad.  Second, it hurt to see a beautiful antique quilt in fine condition used as a canvas.  Surely he could have found a beat-up quilt to paint on!

So I approached the new show with some preconceptions, but resolved to keep an open mind.  I lingered over the artist statement at the entrance to the exhibit, interested to note that he has backed off from his fake-history Underground Railroad statements.  In 2017 the wall tag read "Some quilts were used as signposts for safe houses..."  Five years later, we read "he was intrigued by the heavily debated narrative that quilts in some way doubled as signposts..."  That's progress, I guess, and maybe in five more years he will acknowledge that this narrative is not heavily debated at all, just carelessly repeated by ignorant people.  

But enough nitpicking, let's look at the quilts.  I didn't keep a tally, but it seemed that most of them were in pretty good condition and were simply painted upon and hung on the wall without additional support.  Some were in poor condition, and augmented by patching in pieces from other quilts, or collaging swatches of unquilted fabric, including several kimono pieces, on top. 

Sanford Biggers, Hat & Beard, details


Sanford Biggers, Hat & Beard

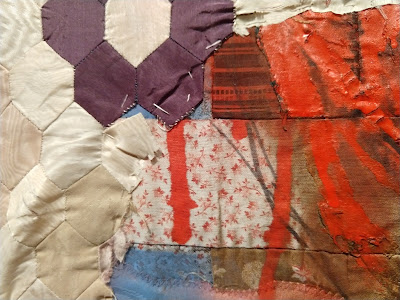
Most of the quilts followed the same recipe: start with a quilt or quilt collage, paint loosely over the top, let the paint (or sometimes, tar) drip and blob.  Some of them had intricate and meticulous stenciled designs, but almost always some area of deliberate mess.

Sanford Biggers, Quilt 30 (Nimbus), detail below


I can't describe the whole show in just one blog post, and probably not even in just two.  So stay tuned and I'll have more pictures and thoughts soon.

Friday, April 1, 2022

Voice from the past

If you were reading my blog (or if you were reading the New York Times) during the summer of 2020, you may remember the silly series called Designer DIY that ran off and on in the Times, in which famous fashion designers came up with adorable sewing and craft ideas for readers to do at home.  Mending and embroidering garments were popular repeat subjects, but making flimsy "jewelry" and handbags also showed up, as well as making a dress out of a pillowcase.

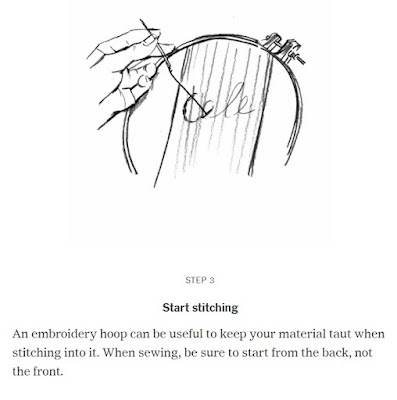
One of my favorites was the feature in which you were instructed on how to embroider your name on your sock.  You were told to use an embroidery hoop, and here's a helpful drawing of work in progress:

from NYTimes Style section

You (unlike the artist or the editor) will notice, of course, that it will be impossible to put the sock on your foot, since the sides of the sock are now sewed together.

I came to love these features, because it enabled me to write snarky comments about how lame the ideas were, and more egregious, how awful the directions were.  If you have 15 minutes to fritter away on the internet today, you might want to read or reread these blog posts, guaranteed to give you lots of laughs.

The posts led to a bunch of comments from my readers, many of whom urged me to write the Times and tell them how awful the series was.  So I did.  Sometime in the summer of 2020 I wrote a long letter that spelled out all the things that they were doing poorly, and urging them to clean up their act.  

I wrote, in part: "If your purpose in this series is to win brownie points in the fashion community and give some designers a bit of free ink, then you have probably succeeded, especially among readers who don’t actually try to do the projects. But if your purpose is to give your readers projects they can succeed at and feel proud of, you are failing miserably. I suspect that the great majority of readers who do the projects are also failing miserably, which I can’t imagine is building warm feelings toward the Times.

"Perhaps things would work better if you let the designers come up with the ideas and let somebody who does actual handwork write the instructions. Better yet, let somebody who does actual handwork come up with the ideas too, so you could present projects that are doable and attractive." 

I received no response, until this morning!

When I found an email, saying "Thank you for contacting the newsroom of The New York Times.  We appreciate readers who share their feedback and help us report thoroughly and accurately.  Someone will read your note shortly, but because of the volume of notes we receive, we cannot respond individually to each one."

I am so gratified that someone will read my note shortly.

Meanwhile, if you want to embroider your sock, please use a darning egg, not an embroidery hoop.

Sunday, March 27, 2022

Another painting motif

I wrote in my last post about the lake motif that I've been using in my daily painting.  Another motif that I've used several times is a hand.  Simplest execution you can imagine: trace around the hand, fill in with color.  


I've been using this motif to experiment with color: not so much which two colors will go well together but how to lay down the color within the hand and in the  background.  I don't want a flat, uniform coat of paint; instead I'm looking for ways to vary the tones and achieve an interesting texture.


Because I don't wash out my paint palette dish at night, I always have five or six dried-up blobs of paint in different colors ready to be reconstituted.  I tend to mix up a supply of my main color, then vary the strokes by occasionally dipping into one of the side colors.  Sometimes the colors blend smoothly, if they aren't too different in value and if the first color has stayed pretty wet before the second one comes on.  Other times there are distinct lines between one color and the next.

I find that I like both approaches.  I also like varying the shape of the hand, either by moving the fingers or cropping the shape on the page. 


When my granddaughter was visiting one day I showed her my hand paintings and she let me trace her hand a couple of times.


I am also using these motifs as a way to practice carefully laying down the paint.  I don't paint a background first and then put the hand over the top; instead I paint the hand first and then paint the background color exactly up to the edge, trying to leave no bit of white between the two colors.  It's improving my hand control!


When I showed these paintings to a friend, she suggested that I try to make my depiction more realistic by shading to show dimension.  I thought about that for a while, but then decided that I like the flat look, at least for now.  Maybe after I've gotten more comfortable with the paint I can circle back and focus more on the "drawing." 

(I even thought about extending this flat approach to other mediums, cutting hand shapes out of patterned paper or fabric and collaging them.  Might hold that thought for another day!)

I'll show you my next recurring motif in another post.  Meanwhile, you can see all my daily art on my daily art blog.

Saturday, March 19, 2022

Painting update

The last time I posted about my daily painting project, I had just purchased a whole array of gouache paints, plus some new brushes, and had started experimenting with this new-to-me paint.  The glory of gouache is that it's opaque enough to totally cover whatever was underneath (helpful for fixing mistakes) and able to lay down a beautiful matte surface if you want.  Or you can dilute it for washy watercolor effects.  I've been trying both approaches.

Frankly, I've been way more interested in learning how the paint behaves than in coming up with artistically rewarding compositions.  I have been fixating on a certain motif and doing it over and over, changing a little something each time I do it.  Today I'll talk about my first repeated motif, the lake.

Maybe it doesn't look like a lake to you, but it does to me.  Not that I have any particular lake connections that this brings to mind (my childhood lake, Huron, is so big that it more resembles the ocean) but it's a nice shape.

I know that other painters can make their gouache expanses look like paint chips -- perfectly smooth and without color variations or brushmarks -- but I can't.  I can get close, as with the pink lake, but that's not really a goal I want to work toward; I find the mottled surfaces of the sky and land far more interesting.

I've played around with the composition in several ways, with multiple lakes, upside-down lakes and portrait-format designs.  All of them have the narrow white outline between the different colors, sometimes rendered in white paint but other times achieved by very carefully leaving white paper between the painted areas.


One of my early lakes was a disaster -- why did I ever think it would be a good idea to give it a handle?

So several days later I decided to paint over the bad part.  It was an experiment in whether I could successfully match the color, and whether I could actually conceal the color underneath.  Success on both fronts, and I find the composition much more pleasing.  The original lives on digitally but at least when I page through my sketchbook I'm not faced with that ugly version.

After 18 days of lakes, I was ready to move on.  I'll show you my next motif in another post.  Meanwhile, you can see all my daily art on my daily art blog.

Monday, February 14, 2022

Asking for advice

I am of two minds when it comes to asking other people for advice, especially in large groups (whether in person or virtual).  There are people whose advice you respect, and there are those who just volunteer useless praise or counterproductive suggestions.  It's easy to ignore those in the second group, but what happens when those in the first group don't agree?

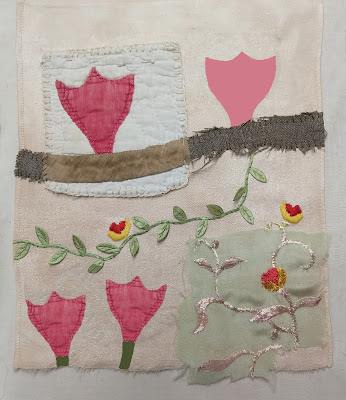
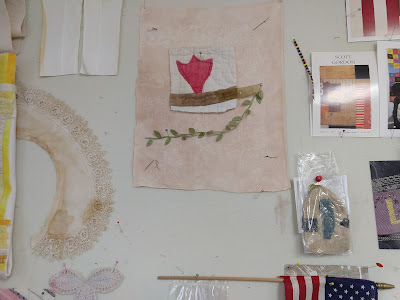
I have had a compositional fragment on my design wall for more than a year, a tulip on a branch cut out from a very old and distressed quilt, sitting on a torn piece from a linen napkin or tablecloth for background.  At some point a length of leafy vine joined it, but I couldn't figure out what else needed to be there.

Last week I found a piece of embroidered silk that seemed to want to join the party, so I stitched it to the bottom corner of the linen.  The original embroidered stems and leaves had begun to disintegrate, so it took a fair amount of stitching with almost-matching thread to secure the fabric and restore the design.

Next I extended the branch from which the quilt tulip was growing, and added another tulip.  Also another little yellow and red flower to match the one on the embroidered silk.


I also found a butterfly, cut from a vintage kimono scrap, but wasn't sure where or if it should go in the composition, so I just pinned it on.  I posted it on instagram as work in progress.  Two people whose opinions I respect suggested that it was finished (I think they meant without the butterfly).

Then I showed it to somebody else whose opinion I respect, and she was not happy.  She said, and I see her point, that the two halves of the composition don't really play well together.  The top half is big and bold, the bottom half is small, pale and delicate.  She thought each half would be better off on its own.

Hmmm.  I thought about it for a while and realized that it wouldn't be too hard to cut the piece in two, since the quilted tulip hasn't been sewed down yet.  I mentally tried out different ways to do this, but none of them seemed great.

Then I thought that maybe the trouble was the right hand tulip, which took on too much weight because of its dark value.  What if it were paler, to restore the focus to the original quilt tulip?  And I realized that the easiest way to consider the alternatives was via photoshop.

So here are four possibilities.  I put them out to you to share my thought process, not to put it up for a vote (I will happily read your comments but unfortunately the buck stops here and I'll be stuck with the final decision).  

Pale tulip

Pale tulip + butterfly

Pale tulip, two new flowers

Pale tulip, three new flowers


I usually audition design decisions in person, pinning and repinning on the design wall; the advantage is that a possibility can stay on display for a long time and your opinion can change over time.  But doing it on photoshop certainly is quicker, and allows a side-by-side comparison with all the versions, or at least as many as you can tile onto your computer screen. 


Now I have a lot more to think about.  And I guess I should really photoshop some possibilities from cutting the piece in two...