If you've never tried free-motion quilting, it will be quite an experience. The important word is "free" -- you can stitch any kind of design that you can draw. And in fact, many have described free-motion quilting as drawing with a needle. The only difference is that the "pencil" stays in one place, and you have to move the "paper" underneath it, instead of vice versa. With a bit of practice you can make beautiful swoopy curves, elaborate straight-line maze designs, cursive writing, and of course, drawing.
Here are some key elements to learn about free-motion quilting:
Start off on the right foot. This part is non-negotiable: you need a special presser foot, not your regular one. You want the presser foot to press on the fabric while the stitch is being made, to keep the thread tension right and keep the fabric under control. But the instant the needle emerges from the fabric, having made a stitch, you want the pressure to ease up so you can move the quilt to its new position. In effect, you want the presser foot to jump up and down with each stitch: up when the needle is up, down when the needle is down.
Such a foot may be called a darning foot, a free-motion foot or a big foot. It may be a closed circle or a part circle with an open space facing you. I like an open foot, because I can better see what I'm doing, and because it's easier to change threads. But you may like one of the other models better. Start with the one that came with your machine and see if you can learn to love it before spending a lot of money on a new kind.
How about them dogs! Most free-motion quilters like to drop the feed dogs, those little toothed rails on the bed of your sewing machine that ordinarily pull the fabric evenly under the needle. You don't want the machine trying to sew a straight line when you want it to do something else. There's probably a button or lever somewhere on your machine to make the feed dogs slip down below the level of your needle plate. If you have a very old, basic machine you may want to tape a piece of index card over the feed dogs to prevent them from pulling on the fabric, with a hole in the middle for the needle.
On the other hand, some quilters like to keep the feed dogs up to put a little more tension on the quilt sandwich and keep it from slipping around. They may compensate by reducing the pressure on the presser foot. Experiment with both approaches and see which one works best for you.
Overcome gravity and inertia. Your biggest enemy in free-motion quilting is the quilt itself, which is big and heavy and unwieldy. You want the quilt to move under the needle only because you are guiding it. But if gravity is pulling the quilt off the edge of your table, or if the weight of the quilt is resisting as you try to move it, your stitching line will have jogs and glitches.
You want to have the entire quilt supported, with enough slack that you can easily push and pull it under the needle. So pile the quilt around the needle, making sure none of it hangs off the table. For a larger quilt, you may want to move a card table or chair alongside your sewing machine to help hold the quilt.
Start in the middle. Because the layers of the quilt sandwich aren't yet held together securely, they are liable to stray, even if you have basted or pinned. The quilter's equivalent of painting yourself into a corner occurs when you quilt toward an area already quilted, and when you get there -- oops! -- there's more fabric on the backing than on the top, or vice versa. Then you get a pleat or wrinkle on the back or a bulge on the front. To prevent that kind of unpleasant surprise, you always want to work from an already-quilted area into an empty area. In general, start in the center of the quilt and work outward.
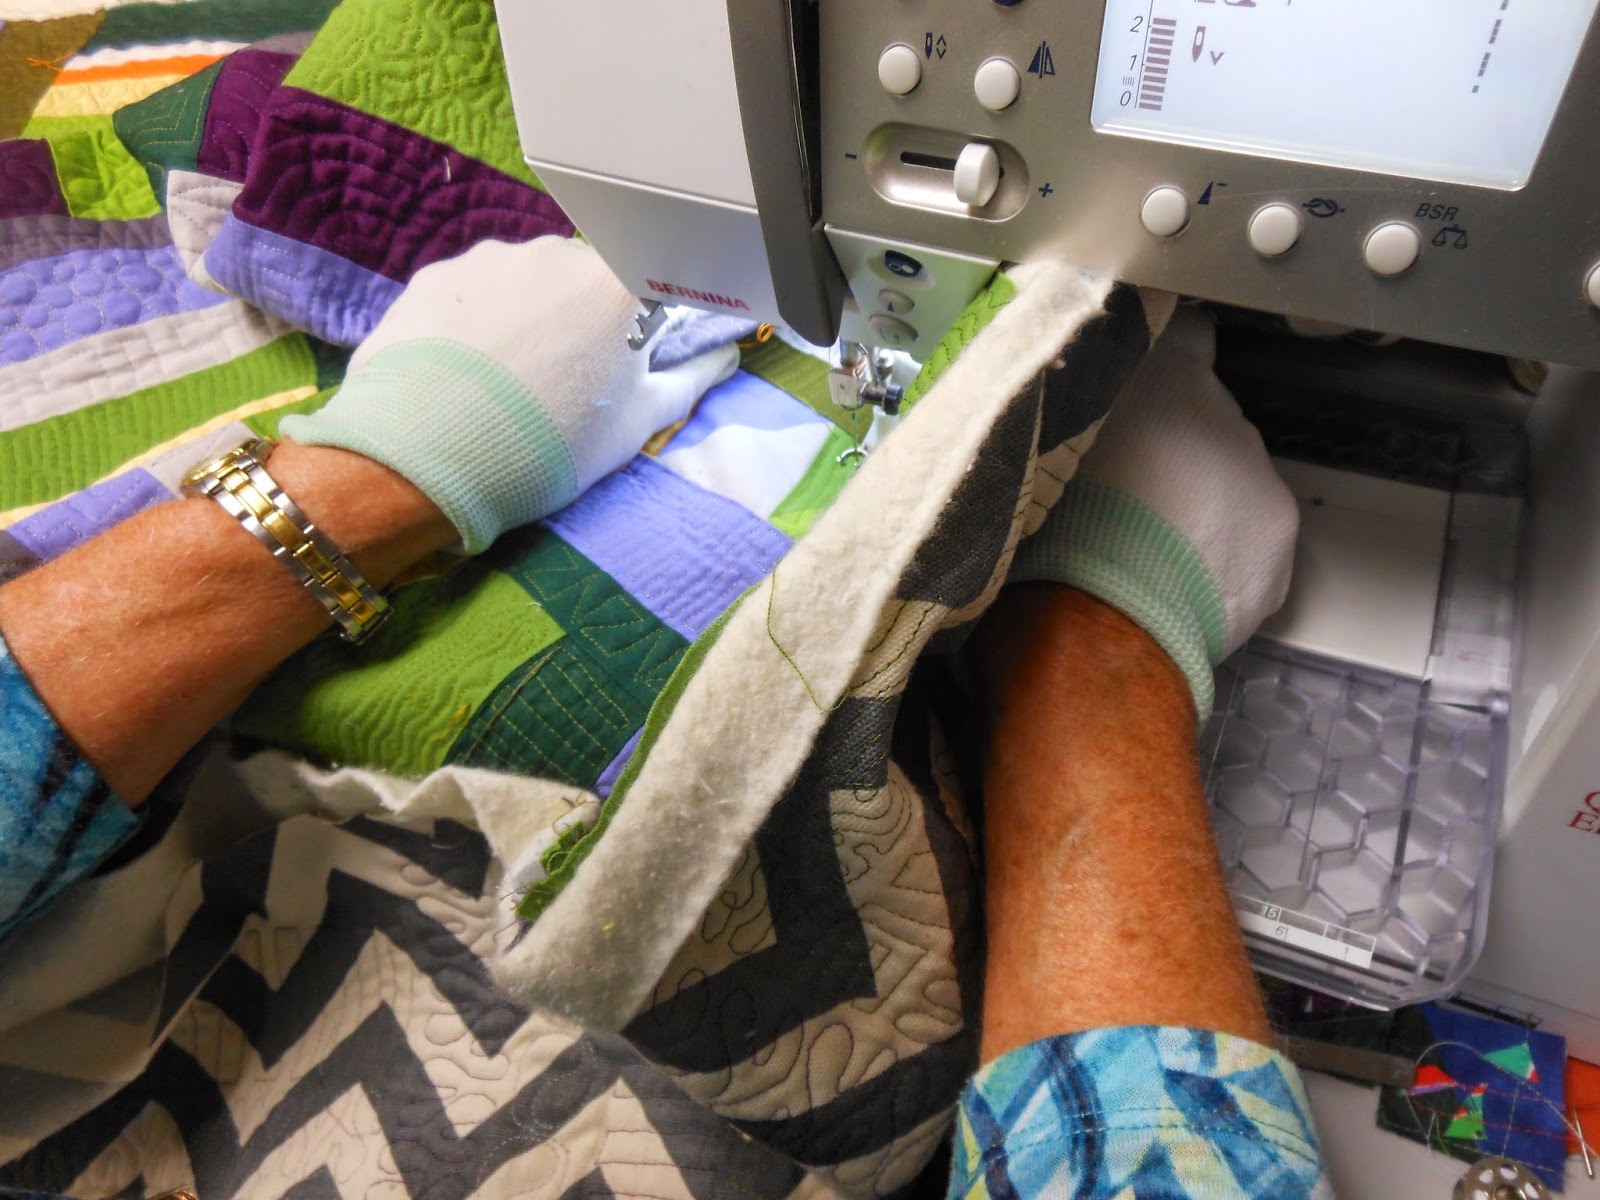
Get a grip! You need a good grip on your fabric to move it under the needle, and to prevent it from moving of its own volition. The classic grip is to spread both your hands around the sewing area, pressing down with your fingertips as you slide the quilt this way and that. I like this grip, but it has drawbacks. I find it puts way too much stress on my wrists, especially with a larger, heavier quilt, because I need to press down too hard to control the fabric.
So I often use alternate grips, grabbing a wad or roll of the quilt between thumb and fingers.

The classic grip: both hands spread on top
Alternate grip: grab a wad of quilt in one hand, spread the other
Alternate grip: grab a fold of the quilt from underneath
No matter how you grab the fabric, life will be better if you use some kind of rubber glove to enhance your grip.
On the left, quilting gloves; on the right, knit gloves with finger grips.
I got rhythm. Free-motion quilting goes much better when you're in a rhythm. Whenever you stop, that rhythm is broken and it's tricky to get back in the groove. Unfortunately, you can't sew forever without stopping; pretty soon you're going to have to reposition your hands before they bump into the harp of the sewing machine or go under the needle. So when you know you have to stop, choose your stopping place carefully. Don't stop in the middle of a curve; stop at a corner or the most abrupt place on the curve.
Have the needle down when you stop, so the quilt doesn't accidentally move out of position while you're shifting hands, repositioning the bulk of the quilt or getting up to go to the bathroom. If your machine doesn't have an automatic needle-down setting, get into the habit of putting the needle down by hand or by foot (depending on your machine) whenever you stop.
Stop and press. I like to press my quilt several times during the quilting. This is especially helpful at the beginning of the process, when there's a lot of loose material crammed under the harp of your sewing machine, and if you're gripping the quilt in a wad. The quilt quickly gets limp and wrinkled from all this handling, and it's much nicer to work on a newly pressed area. Pressing also gives you a little break from the sewing machine, for which your neck and shoulders will thank you.
Each time you stop and press, check the back of the piece to make sure you haven't inadvertently sewed in any pleats or wrinkles, and make sure all layers are smooth in the new area.
Practice, practice, practice. It's a good idea to practice your quilting pattern in advance so you can work in a rhythm rather than having to worry about where to go next. So get some paper and practice drawing a design without lifting the pencil from the paper. If you see a quilting design in a book that intrigues you, practice drawing it for five minutes on paper, then practice sewing it on a test sample for a few minutes before you start on your quilt. These practice minutes will seem like hours, because you're eager to get on with the job, but they will pay off. When you finally get to the quilt, the design will feel natural and you can sew without agonizing over each turn.
Pedal to the metal. It's important to keep up your machine speed when free-motion quilting. It may seem counterintuitive, but you have better control when the needle is moving quickly. And it's easier to maintain your rhythm if you keep going at the same speed. When I'm quilting for long periods of time, I tend to gradually ease off on the pedal and have to remind myself to speed up.
Before we move on, let's talk about the 800-pound gorilla: the automatic stitch regulator feature found on some high-end sewing machines. This feature uses a laser beam to inspect your fabric and detect how far you have moved it since the last stitch. When you have moved it exactly so far, the mechanism sends the needle down for the next stitch. In theory, this means you will have perfectly even stitches no matter how tentatively or jerkily, or how slowly or quickly you move your fabric.
Sounds like a dream come true, right? I thought so too, when I bought my fancy machine, but I didn't learn to love the stitch regulator and now I never use it. It seems clunky to me, like keeping the training wheels on your bike even after you've learned to ride it. I can't sew as fast with the stitch regulator as I can when I'm controlling the machine speed.
I suspect this feature is especially appealing to relatively new quilters because it seems like you can avoid the learning curve of free-motion quilting and be perfect the first time out of the gate. Kind of like those machines advertised on TV that will allow you to take eight inches off your waistline in a week. Right.
I would not recommend a stitch regulator, even though I know many quilters who like theirs. Instead, I recommend you save the money and commit to 12 hours of free-motion practice on a quilt you don't care passionately about. By that time you will be good enough to work on something you love, especially if you start with a simple design and save the complicated feathers for later.


I agree with the stitch regulator, it often gave one large stitch each time I began, I learnt to do free motion quilting from two Houston show winners and practice on small quilts. I like doing angular lines. I love you blog
ReplyDelete