Saturday, September 26, 2020

Designer DIY returns!!

I know many of you, like I, have been bereft since the New York Times pulled the plug on its weekly Designer D.I.Y. feature.  Without it, how could we get ideas for how to produce sloppy, ramshackle low-tech craft items to adorn our bodies and homes?  If so, you will be happy to learn that D.I.Y is back in this week's issue, and it's every bit up to its previous standards.

This week's designer is Batsheva Hay, known for her "post-male-gaze prairie dress, an aesthetic that could perhaps be best described as ironic Amish."  I'm not sure what that means, but here's an example:


You will note that this dress is not one you would whip out on the sewing machine in a half hour.  It appears to be carefully made with standard garment-sewing techniques, which you would probably expect from a $400 outfit.  Hold that thought while we go to this week's project.

You're going to make yourself a dress out of your stash of "vintage Laura Ashley and Ralph Lauren pillowcases."  Batsheva explains that as a kid, she was showed by mom how to cut up old pillowcases that got holes in them.  

(I will pause for a minute to ask you how many pillowcases you have ever owned that got holes in them.  Sheets, yes, at the pressure points of toes and hands-grasping-below-the-chin, but pillowcases?  Perhaps her household was different.)

So assuming you have an old pillowcase lying around, you can turn it into a top.  It's easy -- and needle and thread are optional!


First make sure your pillowcase is wide enough to go around your torso.  I would recommend a tape measure, not a mirror.  I say this after more than one garment that looked like it fit in the store but didn't.  If it isn't big enough, get a second pillowcase, slice them both open on a side seam and sew them together "to your desired fit."


Now spread the case out on the table and "with the scissors, cut a neckline at the center of the closed end that's large enough to fit your head through.  Cut lines at the top of the left and right sides of the pillowcase large enough for your arms."

The second drawing shows how to hold a scissors, which may be helpful for some readers.

What do you want to bet that some people following these "directions" will (a) cut the neck hole too big, (b) cut the neck hole too small, (c) cut the front neckline too high or the back neckline too low, (d) cut the armholes to different lengths, and/or (e) not have the slightest idea how to get shoulder seams into the two-pillowcase combo that anybody with hip measurement more than 36" had to make?

If you didn't do any of the above, good news, "The top is basically finished."  But wait, if you want you can "sew the neck and arm holes neatly with a needle and thread or leave them raw, because that looks good, too."  Not sure exactly what you're doing when sewing the holes neatly -- overcasting? hemming? embroidering? but I'm sure people will figure out something.  (At least one person will probably sew the holes shut and then wonder why she can't put the top on.)

Hey, you can also add embellishments like buttons or trim!  

If that hasn't fulfilled your fashion wishes, Batsheva has another good idea -- add a skirt.  You can take another pillowcase, slit open the entire top end, step into it and pull it "up to where you would like it to rest, near your waist."  The designer, we're told parenthetically, "likes the skirt positioned a bit askew."  I think her wish will be amply fulfilled by the readers who get this far.

All drawings and photos from New York Times


"Using several safety pins, attach the two pillowcases together at the waist, adding a safety pin every inch or so, pinning all the way around."  

Do you worry that perhaps this "dress" will develop a few more holes the first time you try to sit down?  Especially since the safety pins aren't even positioned horizontally to get two pierces of the fabric instead of one?

Or perhaps you worry that if you wear this dress in public you will look like a 1930s urchin straight out of a cabin up the holler? 


The gauzy watercolor illustration of the dress looks pretty classy.  I suspect the actual dress, not so much.

Personally, I'd rather keep those vintage pillowcases as pillowcases, especially since you'll never be able to buy such good quality linens again at ten times what you paid for them back in the day.

Wednesday, September 23, 2020

Baby quilts 4 -- why I love stripes

In this baby quilt project I am trying to stick as much as possible with the fabrics that came from the children's great-great grandmother.  That means my box full of quilt blocks and a very small set of three-inch-wide strips (the red in the first quilt below), plus several yards of an indigo-and-white Japanese fabric printed with origami cranes.  As I have been making more and more quilts from this diminishing stash, I'm needing to augment the original fabrics -- but how to do so without changing the character of the quilts?

I have decided that the best way is to use either solids or stripes.  I'm a lover of striped fabrics, having made several huge quilts out of stripes.  Some time ago I panicked to discover that stripes had gone out of fashion at the fabric store, but was happy to find a lot online, and bought some of every single one available.  They fill three dresser drawers and ought to last me quite a while.

What I like about stripes is that they're graphic, and full of energy, and they seem to fit in with whatever other collection of fabrics you have already assembled.  They go with solids, they go with prints, they go with solids, pepping up whatever is there without being too assertive.  (But if you put them with other stripes, they go crazy!)

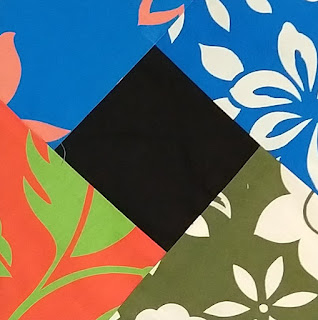
So I felt good about eking out my genuine Hawaiian-shirt blocks with stripes in my current project.


And stripes also make nice bindings.  (What else would go so well with large-scale tropical prints?)


Wednesday, September 16, 2020

Baby quilts 3 -- fixing mistakes


If not for trash TV to listen to while I sew, I would not be nearly as motivated to hang in there through the boring parts in the middle -- where the piecing is done and you just have to sew, sew, and sew some more to get the damn things finished.  Yes, there's a certain calm zen in endless sewing, but it's easy to get distracted and leap up to do laundry or defrost something for dinner unless you have something to hold you to the task.

I'm binge-watching The West Wing now, having never seen it when it was on TV the first time around.  Watching the fictional White House grapple with North Korea, terrorism, budget crises and mad cow disease is strangely resonant with my day job of watching the real White House grapple with real problems.

But let's talk about baby quilts.  I've finished piecing and quilting all five quilts, and have embroidered four and a half names and DOBs.  And unfortunately, have had to stop and fix several mistakes.  They happen to the best of us, but don't you want to just kick yourself when they happen to you?

Here's one from yesterday afternoon:

Bet you don't know many little girls named Elizabh do you?  It took a long time to rip out this stitching, since I had gone over the same line four times.  But I was happy to find that the needle holes weren't too obvious after I got everything corrected.

Earlier in the week I realized that this dark spot, which had been apparent on one of my quilt blocks for a long time, was not just a water spot but something permanent.

I toyed with a turned-edge applique to cover the spot, but ended up with Wonder Under.  Still thinking about whether I need to stitch around the edges or if I can trust the glue to hold up by itself.

Here's last week's mistake: my backing fabric had been plenty big when I started, but had apparently slithered out of position while I was quilting.  When I got out toward the edge I realized that it had slithered so far that I needed to cut out four quilting lines, piece in an inch of new fabric and do the ends of the quilting over again.

But all the mistakes were fixable, and I knew exactly what to do to fix them.  So I got to watch another hour of TV while doing it.  There are worse ways to spend an hour.


Monday, September 14, 2020

Inspirational reading for the day


If you're feeling depressed and discouraged today (as who isn't?), here's a five-minute read that will cheer you up.  The New York Times visited a tiny village in Ecuador where the finest Panama hats are made, and gives us a two-page spread of photos and text that will certainly put a smile on your face.  How nice to be reminded that master craftsmanship still exists and is respected.

New York Times photo

(Don't ask me why it took six weeks from the time this story was posted online to get it into the print newspaper.  I guess we dinosaurs who still love paper have to have our noses rubbed into it every now and then.) 

Wednesday, September 9, 2020

Yo-yo dress update


A couple of weeks ago I wrote about the best in show winner at Form, Not Function: Quilt Art at the Carnegie.  It was a dress made of yo-yos, whose train merged into a rectangular yo-yo quilt, made by Marty Ornish.


I wondered in my blog post whether the yo-yos were recycled from old quilts or newly made from old fabrics or what.  This morning I was happy to find that Marty left a comment on my post that explains all.  She writes:

"These two circa WW2 quilts were made by three women.  The youngest, Joan Crone, is now 86, and she sewed these yo-yos 'to help pass the time during the war' and created the quilt with her mother and grandmother.  Her own grandchildren didn't want these quilts, and after she saw my other work at my solo show at Visions's Art Museum, she gifted the yo-yo quilts to me with the explicit wish that I would incorporate them into my art, and she is thrilled with the response.

"Many of the yo-yos had to be repaired, and I deconstructed one of the quilts to create the dress.

"Regarding the issue you raised as to whether or not the yo-yo quilt meets the strict definition of a 'quilt,' while, as you know, a traditional quilt has three layers stitched together, with the advent of art quilts many textile museums now accept two layers of a textile held together by stitching as qualifying as a quilt."

What a good story, especially the part about how the grandchildren didn't want the quilts (boo, hiss) but they were recycled into a lovely art installation.  Marty does this all the time, and is happy to receive donations of unwanted textiles to use in art.  Those of you whose children or grandchildren are as unappreciative as Mrs. Crone's might want to make note of Marty's address [ marty.ornish@gmail.com ] so your beloved stuff could also find a new home with someone who will treat it very well.

Here's an excellent interview in a San Diego paper in which Marty tells how she got into wearables and other fiber art. 

Regarding Marty's comment about the definition of a quilt, she's right that the art quilt world has generally discarded the requirement of three layers.  As one of the founders of the FNF exhibit, I was proudly responsible for writing its definition -- "layers held together by stitching" -- and participated in several discussions, both as juror and as installer, about whether a given entry met the test.

Once we received a quilt that had been accepted, but when we unwrapped it the lack of any stitching-through-layers was obvious.  We loved the piece and tried and tried to find a single stitch anywhere that went through.  Fortunately the artist had sent in her entry well before the deadline, and we decided to send it back to her and ask her to put in at least two or three stitches that would be clearly visible.  She did, without noticeably changing anything about the piece, and the quilt went on the wall and looked great in the show.

We accepted more than one entry over the year from a well-known fiber artist who did intricate hand-stitching.  It was obvious that the stitches went through multiple layers, because we could see that the back and front were different fabrics and the stitches went all the way through, so it clearly met the FNF definition -- even though the artist's website made a point of saying that she does NOT consider her work to be quilts.

I still think yo-yos are pushing the definition, because the stitching mainly goes between one yo-yo and another rather than holding the two layers of the yo-yo together, but faced with a beautiful piece like Marty's dress, you look for a reason to define it in rather than a reason to define it out.

Tuesday, September 8, 2020

Baby quilts 2 -- piecing


I now have all five tops pieced, or at least the main portions of them.  They're all pretty small and I'm debating whether to add borders to make them larger.  Ordinarily I would expect medium-small quilts to just go on the wall, and probably would go out of my way NOT to add borders.  But these are quilts for kids, and I know that little kids like to use their quilts -- wrap things in them, lie on them, furnish dollhouses and secret caves with them, hide under them.  So what is too small to use?


At some point Zuki gave me several yards of a dark navy cotton print with white origami cranes, and thought maybe it could be used in the quilts.  And I have already used it as sashing in one of the tops.  But would the smaller quilts look brighter with a lighter border, maybe a pink-and-white or blue-and-white stripe ?


Still thinking about what to do next.  Meanwhile, the one that seemed most ready to be quilted up -- the 2x3 above with the blue and white stripe border -- is sandwiched and started, and should be done tomorrow.


Friday, September 4, 2020

Baby quilts again


You probably have had one of these yourself -- an item that has been on your to-do list for so long that it's easy to forget, but when you do remember you are awash in shame for having let it slip so badly.  My hall of shame includes a bunch of baby quilts, the oldest one owed since February of 2013.

There's a back story: 55 years ago I met my dear friend Zuki in graduate school -- but actually it all started decades before that when her grandmother was in a sewing circle in Hawaii.  Somebody in the sewing circle had access to scraps from a factory that made aloha shirts and muu-muus, a bright and beautiful array of tropical prints.  Zuki's grandmother sewed the scraps into hundreds of quilt blocks, some 8 inches across and some 10 inches but all the same pattern, and eventually those blocks, never assembled into quilts, fell into Zuki's possession.  She, an accomplished sewist herself but not that interested in quilting, gave them to me on condition that I make a twin bed quilt to give to her nephew, and I could do what I wanted with the rest.


I did that, maybe 25 years ago, and stashed the rest of the blocks away.  Then 13 years ago Zuki's first grandchild was on the way and I was invited to the baby shower.  I pulled out the stash and made a baby quilt, which was such a hit that I did the same thing for the next five grandchildren.  I did the last four in a marathon in 2013, discovering that it's easier and faster to make four quilts at once than to do them separately.

But since 2013 there have been five more grandchildren, and I haven't done a single quilt.  Finally two weeks ago I decided the time had come.

To my surprise, there were still an awful lot of quilt blocks left in the stash, although I had cherry-picked the best ones long ago.  I managed to put together one set of blocks straight from the box.

But the rest of the leftovers had some problems.  All the center squares are solid colors, which apparently were not in vogue at the shirt factory; some of centers were of different fabrics, too flimsy or too ravelly.  One of the patterns that was used over and over came in several different colorways, including brown, which I didn't think was appropriate for baby quilts.  So I ended up taking about 30 blocks apart, keeping most of the edge pieces, putting the brown pieces and the centers into the scrap pile.

Mostly this was easy, if tedious, although I did mutter and cuss when I got to the occasional block that had been sewed at 100 stitches to the inch and was really hard to rip out.

I had enough edge pieces to make 24 new blocks, and grouped them into two sets: one with all the pinks for a girl, one predominantly in blue for her brother.  Although I have made it a point of pride to make all these baby quilts from the original collection, I have allowed myself to add the occasional solid color or stripe of new fabric as needed.  Here I used new fabric for the solid centers -- yellow for the girl, blue for the boy -- and remade all the blocks.

I'll tell you more in the next post.


Tuesday, September 1, 2020

Form, Not Function 5 -- something different


Every art/quilt show worth its salt has something a little different, something that doesn't follow the usual format of a flat-against-the-wall quilt.  This year's FNF, of course, chose one like this for its best in show; here are some more pieces that fell into this niche.


Shannon Conley, 33°20'N, 105°33'W, 64 x 34 x 6" (detail below)

It has been quilted and pierced, then scrunched and stiffened into a sconce-like form that opens toward the top.  The desert colors reflect the remote New Mexico location of its title (but I hope the actual terrain of the place isn't quite this wrinkled).

Katherine Gibson, Unwearable Cloak, 60 x 84" (detail below)

Gibson has neatly cut magazine pages into tabs, layered them and stitched everything to a fabric support.  I might have wished only for a bit more color to pep up the white expanse of the top half.  I hope the paper will hold up for this quilt to be shipped and seen at many more shows!